
Is your LuvLink lamp stuck with a dim red or flashing light? You are not alone. When the lamp will not connect to WiFi, it breaks the emotional link it is designed to maintain. No more shared touches, color changes, or real-time responses from loved ones. The most common culprit is incorrect WiFi band selection, especially when 5 GHz networks block the connection. This guide walks you through every step, from quick fixes to advanced troubleshooting, to get your lamp back online.
You will learn how to interpret light signals, reconfigure your router, and bypass common setup traps. Whether you are setting up for the first time or reconnecting after a power outage, this guide ensures your LuvLink lamp stays synced and functional.
Decode LuvLink Lamp Light Signals

Understanding what your lamp’s light means is the first step in diagnosing WiFi issues. Each color pattern gives real-time feedback about its connection status.
Dim Red: Not Connected to WiFi
A dim red light means the lamp is powered on but either out of range, disconnected, or waiting for setup. This is the default state during initial pairing or after a reset. If it stays dim red after setup attempts, the lamp failed to join your network. Restart the process and ensure you are using the correct 2.4 GHz network.
Swirling Green: Connected and Synced
When the light transitions to a swirling green, your lamp is fully connected to both WiFi and the internet. It can now send and receive touches with other lamps in the group. No action needed. This is normal operation.
Dim Blue: Weak or Unstable Signal
A dim blue light indicates the lamp sees your network but struggles to maintain a stable connection. This often happens when the lamp is too far from the router or blocked by walls or appliances. Move it closer or reduce interference.
Dim Orange: No Internet Access
If the lamp shows dim orange, it is connected to your local WiFi but cannot reach the internet. This may be due to router DNS issues, firewall settings, or temporary outages. Restart your router and verify other devices have internet access.
Dim Yellow: Awaiting Group Approval
A dim yellow light means the lamp joined the WiFi but needs approval from the group admin. If you are the admin, open the LuvLink app and accept the pending request. Until approved, the lamp remains offline.
Flashing Green and Yellow: Retrying Connection
Flashing green and yellow means the lamp is retrying the connection. This could be due to a temporary network glitch or incorrect password. Restart the lamp and ensure your WiFi credentials are correct.
Pink: Hidden Network Detected
A pink light means the lamp detected a hidden SSID but cannot connect. Routers with SSID broadcast disabled prevent IoT devices from seeing the network. Enable SSID visibility in your router settings.
Confirm Your WiFi Meets LuvLink Requirements
The LuvLink lamp only works under specific network conditions. If your setup does not match these, connection will fail.
Use 2.4 GHz, Not 5 GHz
The lamp only supports 2.4 GHz networks (802.11 b/g/n). It cannot connect to 5 GHz bands. Many modern routers combine both bands under one name, causing the lamp to fail silently.
Fix: Log into your router settings and split the bands into two separate networks. Select the 2.4 GHz option during setup.
Avoid Unsupported Security Types
The lamp supports WPA2-PSK (AES) and WPA-PSK. It does not work with WPA3, WPA2 Enterprise, WEP, open networks, or captive portals. If your router uses WPA3, switch to WPA2/WPA3 mixed mode or disable WPA3 temporarily during setup.
Enable SSID Broadcast
Hidden networks are invisible to the LuvLink app. Even if you manually enter the name, the lamp will not connect.
Fix: Go to your router’s wireless settings and enable SSID broadcast. Make the network visible during setup, then hide it again if desired.
Disable MAC Filtering or Whitelist Lamp
If your router uses MAC address filtering, it blocks unknown devices. The lamp will not connect unless its MAC ID is approved.
Fix: Find the MAC address on the sticker at the bottom of the lamp or in the LuvLink app. Add it to your router’s allowed devices list under Access Control or MAC Filtering.
Fix WiFi Connection Step by Step
Follow this proven sequence when your lamp will not connect. Most issues resolve within these steps.
Reset the Lamp to Pairing Mode
Before starting, ensure the lamp is in setup mode.
Modern and Classic Models: Press and hold the touchpad for 3 to 5 minutes until the light turns dim red.
Infinity Models: Insert a pin into the reset hole under the base until it glows dim red.
Do not skip this step. Pairing only works in dim red mode.
Install or Update the LuvLink App
Use the latest version from Google Play Store or App Store. Outdated versions may fail to detect devices or complete setup. After installing, log in or create an account and enable Bluetooth and Location Services.
Start Device Setup in the App
Open the app and tap Add Device. Two methods are available.
Use Bluetooth Setup (Recommended)
If your lamp has a Bluetooth logo, this is the fastest method. The app scans for nearby devices. Select your lamp from the list and proceed.
Fallback: Use Wi-Fi Setup
If Bluetooth fails, choose Use Wi-Fi Setup. The lamp enters direct provisioning mode. Follow prompts to connect manually.
Connect to 2.4 GHz WiFi Network
Select your 2.4 GHz network from the list. If it does not appear, confirm SSID broadcast is on, temporarily disable 5 GHz, or use a mobile hotspot for testing.
Enter the password carefully. Tap the eye icon to view it. Check for typos, capitalization, or special characters. Tap Save and wait. Do not close the app.
Join or Create a Group
After WiFi connects, the lamp must join a group.
Create a New Group
Tap Create New Group to generate a GroupID. Share this with others so they can join.
Join an Existing Group
Enter the exact GroupID. The group admin must approve the request. Until then, the lamp stays dim yellow.
Pro Tip: Always reuse the original GroupID when reconnecting. This preserves your connection history and settings.
Verify Connection Success
Look for three green ticks in the app for full success. Two ticks mean pending admin approval. The lamp light should turn swirling green or rainbow cycle. If the lamp shows dim purple, it is downloading a firmware update. Wait it out.
Advanced Fixes for Stubborn Connection Issues

When standard steps fail, apply these deeper solutions.
Split Dual-Band Router Networks
Many routers use band steering to automatically assign devices. But the LuvLink lamp cannot handle this.
Fix: Access router settings and find Wireless Settings. Disable Smart Connect, Band Steering, or Auto Channel. Create separate SSIDs for 2.4 GHz and 5 GHz. Connect the lamp to the 2.4 GHz network only. Now try setup again.
Test with a Mobile Hotspot
Rule out home network issues by using your phone’s hotspot.
Steps: Enable hotspot on your phone. Connect both your phone and lamp to it. Run setup in the LuvLink app. If it works, the problem is your home router. Focus on 2.4 GHz, SSID, or MAC settings.
Try a Different Phone or Tablet
App glitches, OS bugs, or permission issues can block pairing.
Fix: Install the LuvLink app on another device. Ensure Bluetooth and location are enabled. Repeat setup process. If it works, clear cache or reinstall the app on your original device.
Clear App Cache or Reinstall
Corrupted app data can cause freezes or failed connections.
On Android: Go to Settings, Apps, LuvLink, Storage. Tap Clear Cache and Clear Data.
On iOS: Delete the app. Reinstall from the App Store. Re-grant permissions. Then try setup again.
Power Cycle All Devices
Reset your entire network stack.
Steps: Unplug the lamp for 10 seconds, then replug. Power off your router for 10 seconds, then restart. Close and reopen the LuvLink app. Retry setup. This clears temporary glitches in both lamp and router.
Reposition the Lamp for Better Signal
Signal strength matters. Even a small move can fix connection drops.
Tips: Place within 10 to 15 feet of the router. Avoid thick walls, metal furniture, microwaves, or cordless phones. Rotate the lamp 90 degrees. Its internal antenna may be misaligned. Try different spots until the light turns green.
Perform a Factory Reset (Last Resort)
If nothing works, reset the lamp completely.
How to Factory Reset
Unplug the lamp. Press and hold the touchpad. While holding, plug it back in. Continue holding for 15 to 60 seconds. Release when light flashes red or turns dim red. Now start setup from scratch.
Warning: This erases all settings. You will need the GroupID to rejoin the group.
Fix Common App Errors
The LuvLink app may show errors during setup. Here is how to resolve them.
Unable to Join the Friendlamps Network
This means the app cannot detect the lamp.
Solutions: Ensure lamp is in dim red mode. Verify Bluetooth and Location are on. Try a different phone. Check that the MAC ID matches the lamp’s sticker.
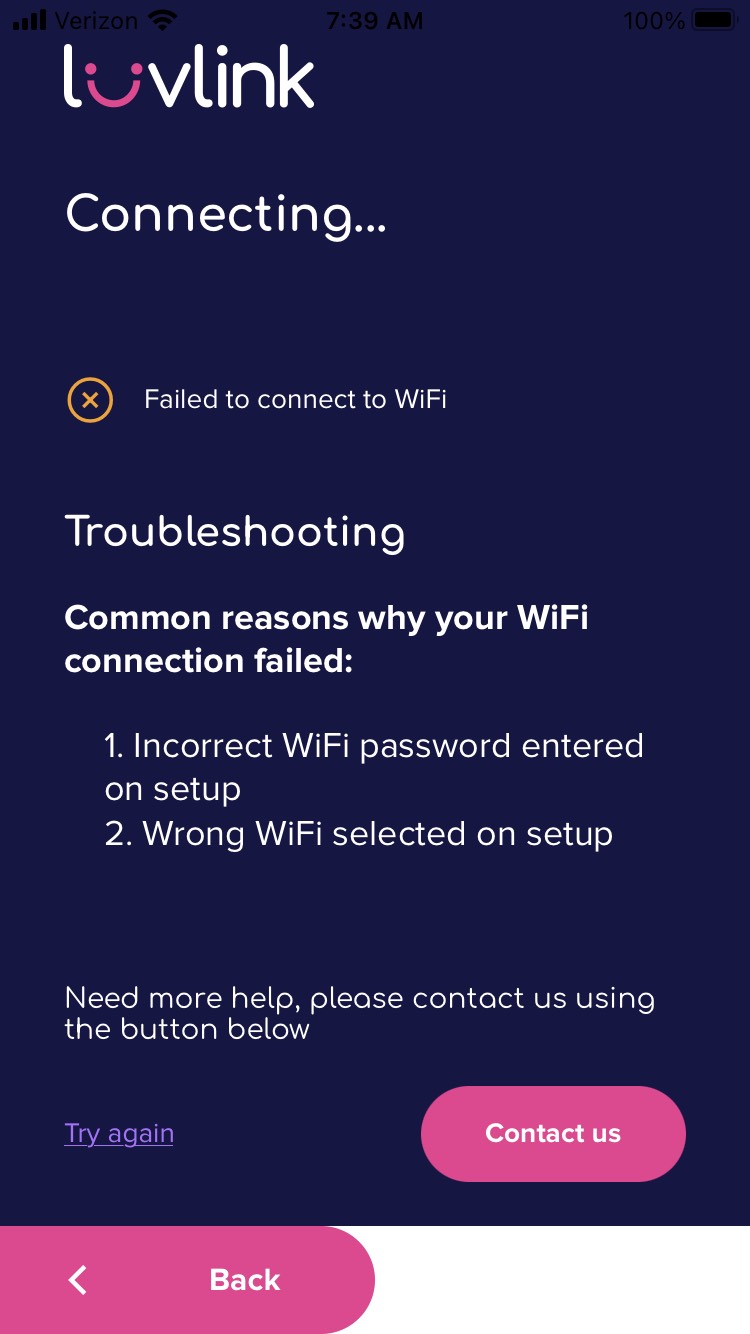
Failed to Connect to WiFi
Caused by wrong password, 5 GHz, or signal issues.
Fix: Re-enter password using eye icon. Confirm you are on 2.4 GHz. Move lamp closer to router. Use hotspot to test.
Connect to Device Failed
Bluetooth communication failed.
Fix: Restart Bluetooth. Close and reopen app. Reinstall app. Try another device.
Network Not Appearing in App
Your network is not showing up.
Causes: Hidden SSID, 5 GHz only, or router firewall blocking IoT devices.
Fix: Enable SSID broadcast. Split bands. Use hotspot for testing.
App Freezes During Setup
Software glitch or permission issue.
Fix: Clear app cache or reinstall. Update phone OS. Try a different device.
Maintain Reliable Connectivity
Once connected, keep your lamp online with these best practices.
Reconnect After Power Loss
After an outage, the lamp tries to reconnect automatically. If it fails, it returns to dim red. Re-pair using the original GroupID. No need to create a new group.
Keep App and Firmware Updated
Updates fix bugs and improve WiFi compatibility.
Tips: Enable auto-updates for the LuvLink app. Watch for dim purple light. This indicates firmware update. Update router firmware too.
Use Sleep Timer Without Disconnecting
Schedule automatic dimming or shutdown via the app. This prevents light disturbance while maintaining network presence and preserving touch history.
Contact LuvLink Support When Stuck
If all else fails, reach out to LuvLink Support.
What to Provide
Include your issue description, GroupID, MAC ID (on lamp sticker or in app), list of steps you have tried, and screenshots of error messages.
Support Channels
Contact Form: Available at luvmate.com/support. Live Chat: Available on website. Email: Response within 24 to 48 hours.
Tip: Including MAC ID and GroupID speeds up diagnosis and resolution.
Key Takeaways for LuvLink Lamp WiFi Connection
The LuvLink lamp thrives on connection, both technical and emotional. By ensuring it is on the right 2.4 GHz network with correct permissions and settings, you keep the bond alive. Always reuse your original GroupID when reconnecting to preserve group history. Avoid the 5 GHz trap by splitting your router bands or selecting 2.4 GHz explicitly during setup. Test with a mobile hotspot when in doubt to isolate network issues from device problems. With these steps, your lamp will glow green again, ready to share love across miles.
Frequently Asked Questions About LuvLink Lamp WiFi Connection
Why does my LuvLink lamp only connect to 2.4 GHz WiFi?
The lamp uses 2.4 GHz because it offers longer range and better wall penetration compared to 5 GHz. This frequency is standard for most IoT devices and provides more stable connectivity for low-bandwidth, continuous connections.
How do I fix a dim red light on my LuvLink lamp?
A dim red light means the lamp is not connected to WiFi. Reset it to pairing mode by holding the touchpad for 3 to 5 minutes until it turns dim red. Then retry the setup process using the LuvLink app and ensure you select a 2.4 GHz network.
Can I use my LuvLink lamp on a hidden WiFi network?
No. Hidden SSIDs prevent the lamp from detecting the network. Enable SSID broadcast in your router settings during setup. You can hide the network again after successful connection.
What does dim yellow mean on the LuvLink lamp?
Dim yellow means the lamp connected to WiFi but is waiting for group admin approval. Open the LuvLink app and approve the pending request to complete the setup.
Why does my LuvLink lamp keep showing dim blue?
Dim blue indicates a weak or unstable WiFi signal. Move the lamp closer to your router, reduce interference from walls or appliances, and ensure it is within 10 to 15 feet of the router.



