
A dirty projector can silently ruin your viewing experience, dimming images and causing annoying dust spots to appear on screen. While you might think cleaning a projector lamp means scrubbing the bulb itself, the reality is quite different. The actual lamp bulb is extremely sensitive to oils, moisture, and physical contact, making external maintenance the safer approach for most users. This guide covers safe cleaning methods for the lens, air filter, lamp housing, and internal components, helping you restore brightness and extend your projector’s lifespan without voiding the warranty or causing damage.
You will learn exactly which tools to use, step-by-step procedures for each component, and when to call a professional instead of attempting repairs yourself.
Power Down and Cool the Projector First
Before any cleaning, safety must come first. Projector lamps generate extreme heat, often exceeding 200 degrees Celsius during operation. Attempting to clean a hot projector risks burns, thermal shock to components, and condensation damage to sensitive electronics.
Always turn off and unplug the projector before cleaning. Wait at least 30 minutes for the lamp to cool completely, or several hours if the projector has been running continuously. Remove all cables including HDMI, USB, VGA, and power connections to prevent accidental power-on during maintenance. If your projector is ceiling-mounted, consider temporarily removing it for better access, but avoid shaking or jostling the unit as this can misalign the image.
Clean the Air Filter and Intake Vents
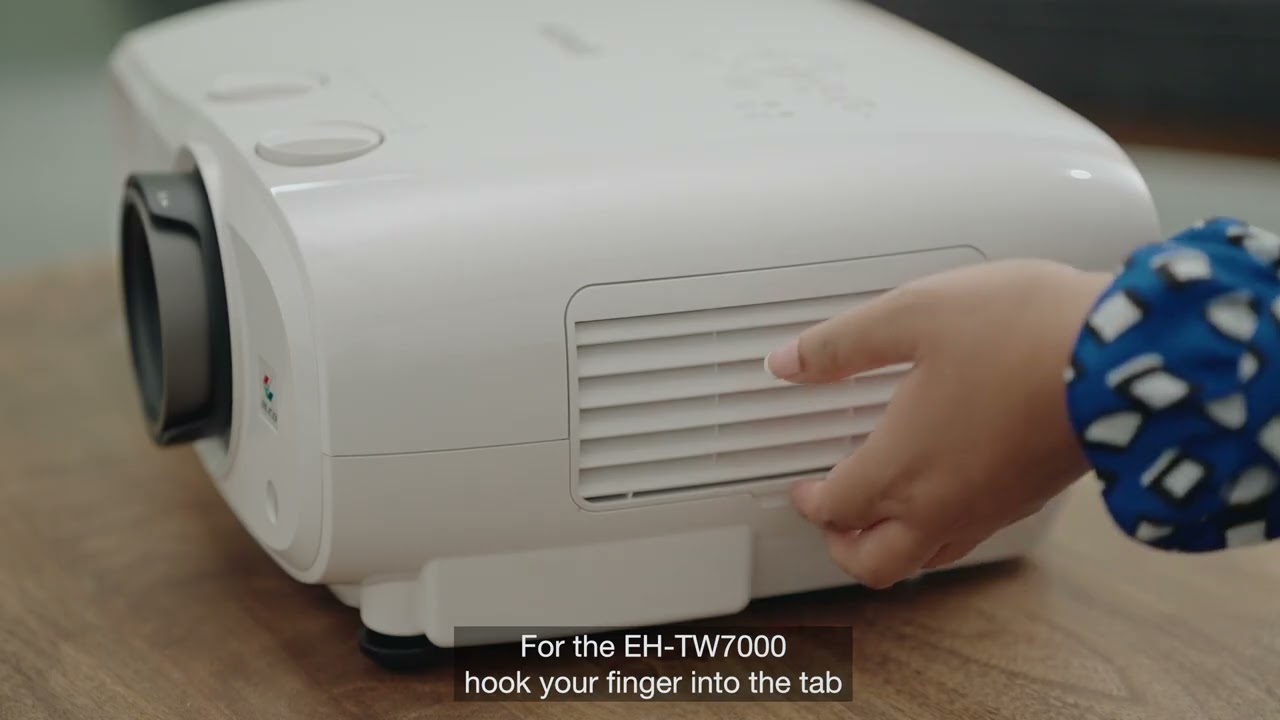
The air filter is your projector’s first defense against dust, and keeping it clean directly impacts cooling efficiency and image quality.
Locate the air filter on the side or bottom of your projector. Remove it carefully and use a small electronics vacuum with gentle suction to draw out accumulated dust. Avoid household vacuums as they generate static electricity that can damage filter fibers. For intake vents, use compressed air at 6 ATM or 87 PSI maximum in short bursts, holding the can upright to prevent propellant discharge. Alternatively, a hand-operated blower or dry Swiffer duster works well for non-invasive cleaning.
Inspect the filter for tears, warping, or heavy clogging. Replace the filter if damaged rather than attempting to clean it. Never wash filters with water unless the manufacturer explicitly allows it. Clean the air filter every 3 to 6 months or after every 100 hours of use, whichever comes first. In dusty environments or mobile setups like RVs, clean filters more frequently, every 1 to 3 months.
Clean the Projection Lens Properly
Only clean the lens when you notice visible image degradation such as smudges, haze, or floating spots. Over-cleaning risks damaging delicate anti-reflective coatings.
Start with a hand blower to remove loose particles. Never use your breath as moisture can condense on cold glass and damage coatings. If dust remains, use a clean anti-static lens brush, gently sweeping in circular motions from center to edge. Store the brush separately to avoid oil contamination from fingers.
For fingerprints or oily residue, apply 1 to 2 drops of optical lens cleaner to lens-cleaning paper rather than directly on the lens. Wipe gently in a circular motion from center to edge, then finish with a dry microfiber cloth if needed. Never use Windex, paper towels, or alcohol-based cleaners unless the manufacturer specifies they are safe. These can strip anti-reflective coatings and scratch the glass.
Always use the lens cap when the projector is off to prevent dust accumulation between cleanings.
Clean the Lamp Housing and Bulb Safely

Access the lamp housing only after powering down and allowing complete cooling. Open the lamp cover per your model’s instructions, which may involve removing screws or releasing latches. Wear clean gloves or wash your hands thoroughly beforehand to avoid transferring skin oils to components.
Use compressed air to blow dust from around the bulb, reflector, and cooling vents. Focus on areas where dust collects near the lamp’s heat sink. Avoid touching the reflector surface as scratches reduce light output significantly.
If the bulb glass is visibly dusty, wipe it only with a dry microfiber cloth. Never apply liquids including water or isopropyl alcohol, as these can cause thermal stress or leave residue that creates hot spots. Never touch the bulb glass with bare hands because skin oils cause hot spots and lead to premature failure. One user noted that compressed air is the wisest choice, and attempting to wipe the bulb risks more damage than leaving dust in place.
Internal Cleaning for Advanced Users Only
Internal cleaning requires disassembly and is not recommended for average users. Consider this only if the projector is old, fan noise has increased significantly, overheating persists despite filter cleaning, or dust spots appear in the image indicating internal contamination.
Opening the unit may void the warranty and exposes high-voltage circuits. If you proceed, unplug and cool completely, then use precision magnetic screwdrivers with a 2 mm bit to remove all screws while labeling them for reassembly. Gently pry the casing open with a plastic spudger to avoid scratches, and disconnect flex cables by releasing their locking tabs.
Clean fans by holding the blades with a plastic tool while blowing compressed air to prevent overspinning that damages motor bearings. Blow air between heat sink fins and clean fan blades with short bursts. For internal optics including FEL lenses, mirrors, and IR-blocking glass, use compressed air or a dry brush first. For stubborn spots, use folded lens tissue in the quadrant method, applying slight moisture with 90 percent or higher isopropyl alcohol only if approved for your specific optics.
Reassemble and Recalibrate the Projector
After cleaning, reseat all ribbon cables securely, ensuring they click into place. Reinstall the lamp and cover with proper alignment, checking that notches on the reflector align correctly. Replace the casing and tighten screws in the original order to avoid stress on plastic tabs.
Power on and recalibrate the image. Adjust focus for sharp edges, use keystone correction to fix trapezoidal distortion, apply skew adjustment if lines appear slanted, and realign the image position if the lens or mirror was disturbed. Take time with these settings as misalignment can persist even if cleaning was successful.
Verify Performance After Cleaning
Test the projector by displaying a test pattern or white text on a black background, projecting onto a flat white surface. Look for clear readable text at normal viewing distance, no floating dust spots or shadows, and uniform brightness and color across the image.
Check operational improvements. Fan noise should be quieter due to improved airflow, operating temperature should be lower meaning better cooling efficiency, and brightness should improve visibly if dust was blocking the light path. One user restored readable 720p text and eliminated dust artifacts after cleaning an older Sharp PG-F325W projector.
Follow a Preventive Cleaning Schedule
Different components require different cleaning frequencies to maintain optimal performance.
Clean the exterior housing weekly using a dry microfiber cloth. Clean the air filter every 3 to 6 months using vacuum or compressed air. Clean intake vents every 3 to 6 months using a blower or soft duster. Clean the projection lens only when image degrades, following the blower brush cleaner sequence. Clean the lamp housing during filter cleaning using compressed air. Clean internal components every 6 to 12 months in dusty environments, but only attempt this if you have advanced technical skills.
Avoid These Common Mistakes
Never touch the bulb glass with bare hands as oils cause hot spots and premature failure. Never use Windex, alcohol, or paper towels on the lens as these scratch or dissolve coatings. Never spray cleaner directly on optics, always apply to cleaning paper first. Never operate without an air filter as this increases dust intake and overheating risk. Never spin fans at high speed with compressed air as this damages motor bearings. Never open modern projectors unnecessarily as high-end models have fragile aligned optics.
Always work in a clean dry environment to prevent new dust from settling. Always use manufacturer-approved tools including microfiber, lens brushes, and optical cleaners. Always consult the service manual before disassembly to check for model-specific warnings. Always seek professional help if unsure, especially for laser or 4K projectors.
When to Seek Professional Help
Certain situations require expert intervention rather than DIY cleaning. If the projector is under warranty, opening it may void coverage. If internal haze is visible in the lens, disassembly is not safe. If burn-in or dead pixels appear on the LCD panel, the issue requires parts replacement. If the lamp or fan is failing, professional replacement ensures proper installation. If you have a high-end or laser model with complex optics, professional service prevents alignment issues.
Even experienced users should avoid opening modern sealed units without official service documentation.
Frequently Asked Questions About Cleaning Projector Lamps
Can I clean the projector bulb with water or alcohol?
No. Using water or alcohol on the bulb glass risks thermal stress, condensation, and residue buildup that creates hot spots. The only safe method is using dry compressed air or a dry microfiber cloth. Touching the bulb with bare hands should also be avoided as skin oils cause hot spots and premature failure.
How often should I clean my projector air filter?
Clean the air filter every 3 to 6 months or after every 100 hours of use, whichever comes first. In dusty environments such as rooms with open windows, or in mobile setups like RVs or ambulances, clean filters more frequently, every 1 to 3 months. A clogged filter restricts airflow and causes overheating.
Why does my projector show dust spots even after cleaning the lens?
Dust spots that persist after lens cleaning indicate internal contamination in the optical path. This means dust has accumulated on internal components such as the FEL lens, mirrors, or IR-blocking glass. Internal cleaning is required, but this is advanced work that may void warranties. If your projector is modern or under warranty, seek professional service instead.
Is it safe to use compressed air inside my projector?
Yes, but with precautions. Use compressed air at 6 ATM or 87 PSI maximum in short bursts. Hold the can upright to prevent propellant discharge. For internal components, use short bursts and avoid excessive pressure. Never spin fan blades rapidly with air as this damages motor bearings. Hold fan blades with a plastic tool while cleaning to prevent overspinning.
What happens if I don’t clean my projector regularly?
Neglecting maintenance leads to several problems. Dust buildup restricts airflow causing overheating and potential automatic shutdowns. Reduced cooling efficiency shortens lamp life and increases fan noise. Dust on optics casts shadows and reduces brightness. Eventually, the projector may fail prematurely or require expensive professional cleaning or replacement.
Can I use Windex to clean my projector lens?
No. Windex and household glass cleaners damage anti-reflective coatings on projector lenses. Use only optical lens cleaner specifically designed for coated optics. Apply 1 to 2 drops to lens-cleaning paper, not directly on the lens, and wipe gently from center to edge using circular motions.
Key Takeaways for Maintaining Your Projector
Proper projector maintenance focuses on protecting the entire optical and thermal system rather than scrubbing the bulb itself. For most users, stick to external cleaning including regular air filter maintenance every 3 to 6 months, lens cleaning only when image quality drops, and weekly housing dusting. Never use liquids on the bulb or internal electronics, never touch the bulb with bare hands, and never use household cleaners on the lens.
Advanced internal cleaning is feasible only on older non-warranty units with proper tools and careful reassembly. Always recalibrate after any internal work. With the right tools and caution, you can extend your projector’s life significantly, improve image quality, and avoid costly replacements. A well-maintained projector will exhibit lower operating temperatures, quieter fans, brighter images, and longer component lifespan.



