Your Epson projector’s image has dimmed, flickers, or displays a “Replace Lamp” warning. These are clear signs it’s time for a lamp change. The good news is that replacing an Epson projector lamp is a straightforward task you can complete in under 10 minutes with basic tools. This guide walks you through every step, from powering down safely to resetting the lamp timer, so you can restore full brightness and extend your projector’s life.
Power Down and Cool the Projector
Before touching any components, you must power down correctly to ensure safety.
Unplug and Wait 20 to 60 Minutes
Turn off the projector using the power button, then unplug the cord from the wall. The lamp housing becomes extremely hot during use and can cause serious burns if handled too soon. Wait at least 20 minutes, or up to 60 minutes for high-brightness or extended-use models, before proceeding. Never skip this cooling step.
Why Cooling Matters
Internal temperatures can exceed 200 degrees Fahrenheit during operation. Working too soon risks burns and may damage internal components. Use this waiting time to gather your tools and verify you have the correct replacement lamp.
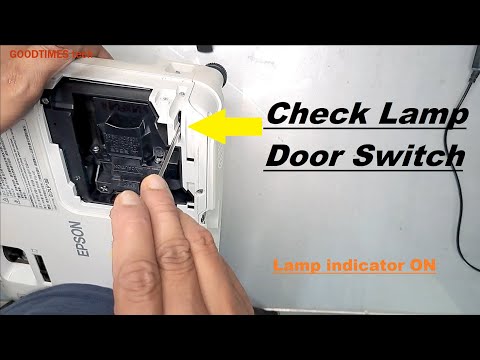
Locate the Lamp Compartment

Access varies by model, but all Epson projectors feature user-replaceable lamps designed for easy removal.
Rear or Top Access Models
These are common in PowerLite 822, 830, 950, and VS230 projectors. Place the projector on a stable surface with the rear or top facing up. Look for a small panel marked with a lamp icon or labeled “Lamp.” Remove the single Phillips screw, then gently lift or slide the cover off.
Bottom Access Models
Used in PowerLite 73c. Flip the projector upside down. Slide the lamp cover tab to unlock and remove the panel. The lamp module will be visible underneath.
Side Access with Latch
Found in Epson 3700 and Home Cinema 2045. Locate the side-mounted cover. Loosen the single screw without removing it fully, then pull the cover toward you. Press the front latch to release the lamp module.
Always work in a clean, dust-free area to prevent debris from entering the projector.
Remove the Old Lamp Module
Once the compartment is open, carefully extract the used lamp.
Loosen the Two Securing Screws
Inside the housing, you’ll see the lamp module held by two Phillips screws. Turn both counterclockwise several full turns. On some models like the PowerLite 73c, the screws are captive, meaning they stay in place. Leave them partially engaged to avoid dropping them.
Pull the Lamp Straight Out
Grasp the lamp by the handle, notches, or grip area. Never touch the glass portion. Depending on your model, pull the lamp straight down for vertical insertion or straight out for horizontal insertion. If resistance occurs, double-check that the screws are fully loosened before proceeding.
Handle Broken Lamps with Care
If the old lamp is cracked or broken, wear gloves and carefully remove glass fragments. Avoid inhaling any dust, as mercury is present in all Epson projector lamps.
Install the New Lamp Module

Now insert the replacement lamp with precision.
Choose the Right Replacement Lamp
Use only model-specific lamps like ELPLP78, ELPLP96, or ELP-LP69. Check your projector’s manual or the label on the old lamp housing for the exact part number. Common compatible models include the Epson 3700, PowerLite 822 and 830, and 5030UB.
Align and Insert the New Lamp
Take the new module and inspect it for damage. Align it using the shaped edges, notches, or keyed sides. Match the plug to the internal socket carefully. Push gently but firmly until you hear a distinct click, which confirms full engagement.
Secure the Lamp with Screws
Reinstall the two screws and hand-tighten only. Over-tightening can strip threads or crack the plastic housing. On latch-equipped models like the Epson 3700, snap the front latch back into place.
Misalignment is a top cause of startup failure or dim images. If the projector will not turn on, recheck the insertion.
Reattach the Lamp Cover
A secure cover is critical because Epson projectors have safety locks that prevent startup if the cover is loose.
Slide Cover Into Place
Position the lamp cover so it fits flush with the projector body. Reinsert the single screw and tighten fully.
Verify Full Seating
Ensure the cover is flat, aligned, and snug. On models like the PowerLite 73c, a poorly seated cover will trigger a safety shutdown and prevent the projector from turning on.
Clean the Air Filter
While the projector is open, cleaning the filter improves airflow and extends lamp life.
Locate and Remove the Filter
Find the filter compartment, usually on top near the lens or beside the lamp cover. Pull it straight out using the tab.
Clean With Compressed Air or Brush
Use compressed air to blow dust from the inside out, or gently brush with a soft, dry brush. Never use water, solvents, or a vacuum, as these can damage the filter.
Reinsert Until It Clicks
Slide the filter back in until it seats fully. A loose filter reduces cooling efficiency and can cause overheating.
Clean the filter every time you replace the lamp. This simple step prevents most heat-related failures.
Reset the Lamp Hour Counter
This step is essential to stop false “Replace Lamp” warnings from appearing.
Access the Reset Menu
Power on the projector. Press Menu on the remote or projector. Navigate to Info to confirm usage, then go to Reset and select Reset Lamp Hours. Confirm the action when prompted.
Model-Specific Reset Paths
| Model | Reset Path |
|---|---|
| PowerLite 822/830 | Info to Reset Lamp Hours |
| VS230 | Reset to Reset Lamp Hours |
| Epson 3700 | Reset to Reset Lamp Hours |
| Home Cinema 2045 | Info to Reset Lamp Hours |
| 5030UB | Info to Reset Lamp Hours |
Forgetting to reset is the number one reason users see “Replace Lamp” warnings after installation.
Choose Genuine vs. Third-Party Lamps
Your lamp choice affects performance, lifespan, and safety.
Benefits of Genuine Epson Lamps
Genuine lamps offer longer lifespan of 3,000 to 5,000 hours compared to 500 to 1,500 hours for cheap alternatives. They provide consistent brightness and color accuracy. Most genuine kits include gloves, a screwdriver, and instructions. They come with an 180-day to one-year warranty and may produce a faint odor for the first 30 minutes, which is normal off-gassing that disappears quickly.
Risks of Third-Party Lamps
Third-party lamps often emit a strong, lasting plastic odor. They may have poor fit or electrical contact issues. Brightness and color can be inconsistent. They may void your warranty if damage occurs. Lifespan is significantly shorter, especially in Bright mode.
For home theaters, classrooms, or offices, always use genuine Epson lamps.
Troubleshoot Common Post-Install Issues
Even with careful installation, problems can occur. Here is how to fix them fast.
Projector Will Not Turn On
Likely cause is the lamp cover not being secure. Fix this by rechecking screw tightness and cover alignment. A loose cover triggers safety lockout.
Dim or Yellowish Image
Likely cause is the lamp not being fully seated or being defective. Fix by removing and reinserting the lamp. If the issue persists, test with a known-good lamp.
Burning Smell After Installation
Likely cause is a third-party lamp. Fix by replacing with a genuine Epson module.
Lamp Warning Light Still On
Likely cause is the timer not being reset. Fix by navigating to Reset to Reset Lamp Hours and confirming.
Flickering or No Image
Likely cause is poor electrical connection. Fix by re-seating the lamp and ensuring the plug is fully engaged.
Overheating or Fan Noise
Likely cause is a clogged air filter. Fix by cleaning or replacing the filter during your next maintenance.
Dispose of the Old Lamp Responsibly
Epson lamps contain mercury and are classified as hazardous waste.
Do Not Throw in Regular Trash
Improper disposal risks environmental contamination and legal penalties.
Safe Disposal Options
Return the old lamp to authorized Epson service centers. Use certified e-waste recyclers. Drop off at retailer take-back programs like Best Buy. Check your local hazardous waste collection sites.
Keep the original packaging to safely transport the used lamp.
Time and Skill Requirements
You do not need technical skills for this task, just attention to detail.
First-Time Users
Expect to spend 8 to 10 minutes if reading instructions or cleaning the filter. Consult the manual if unsure about reset steps.
Experienced Users
With practice, replacement takes under 4 minutes. Some users complete it in under two minutes.
No Special Training Needed
Epson designs all projectors with user-replaceable lamps. The process is intuitive and requires minimal tools.
Keep your old lamp as a backup for emergency swaps during presentations or movie nights.
Final Verification Checklist
Before declaring the job done, run through this quick checklist.
Ensure the projector is powered off and unplugged. Confirm the lamp has cooled for 20 to 60 minutes. Verify the lamp cover was removed safely. Check that the old lamp was removed without force. Confirm the new lamp was inserted with a click. Ensure two screws are hand-tightened, not over-tightened. Verify the lamp cover is reinstalled and flush. Confirm the air filter is cleaned and reseated. Check that the projector powered on successfully. Verify the image is bright, sharp, and uniform. Confirm the lamp timer was reset to zero. Set the used lamp aside for recycling. Verify no warning lights or error messages appear.
Frequently Asked Questions About Changing Epson Projector Lamps
How Do I Know When My Epson Projector Lamp Needs Replacing?
Signs include a dim or flickering image, a “Replace Lamp” warning appearing on screen, and the lamp having been used for more than 3,000 hours. If your image appears washed out or the colors look off, the lamp is likely degrading.
Can I Replace the Lamp Myself Without Professional Help?
Yes. Epson designs all projectors with user-replaceable lamps. Over 95 percent of users report successful DIY replacement without technical support. The process takes 3 to 10 minutes depending on your experience.
What Happens If I Do Not Reset the Lamp Timer?
The projector will continue displaying a “Replace Lamp” warning even after installing a new lamp. This does not damage the projector, but it creates confusion. Always reset the lamp hours to zero after replacement.
Are Third-Party Lamps Safe to Use?
Third-party lamps carry risks including shorter lifespan, inconsistent brightness, persistent burning odors, and potential fit issues. They may also void your warranty if damage occurs. For reliable performance, genuine Epson lamps are recommended.
How Long Does an Epson Projector Lamp Last?
Genuine Epson lamps typically last 3,000 to 5,000 hours, depending on usage mode. Using Eco mode extends lifespan, while Bright mode accelerates wear.
Key Takeaways for Changing Your Epson Projector Lamp
Replacing an Epson projector lamp is a quick, safe, and essential maintenance task that restores full brightness and extends your projector’s life. By following this guide, you will avoid common pitfalls like forgetting to reset the timer, failing to seat the lamp cover properly, or using incompatible lamps. Always use genuine Epson lamps for best results, as they offer superior lifespan, brightness, and reliability compared to third-party alternatives. Remember to cool the projector before starting, work in a clean environment, and dispose of the old lamp responsibly at an authorized recycling center. With the right approach and attention to detail, you can complete this task in minutes and keep your projector running like new for thousands of hours.