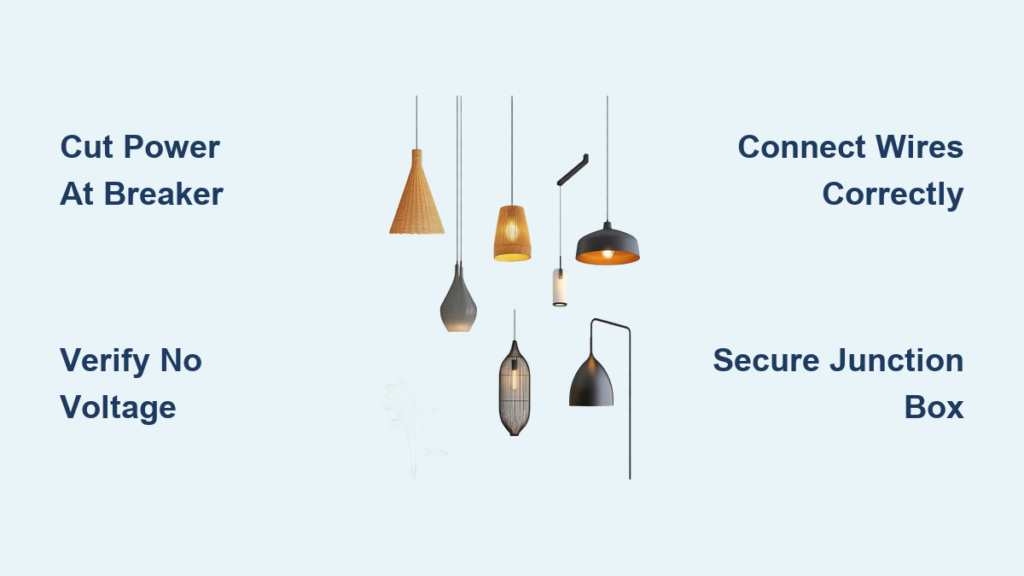
Changing a ceiling lamp can transform the look of a room and improve lighting efficiency, especially when upgrading to modern LED fixtures. But more than aesthetics, doing it safely and correctly matters most. If you’re wondering how to change a ceiling lamp, this guide walks you step by step through the entire process, from cutting power to flipping the switch on your new fixture.
You do not need to be an electrician to change a ceiling lamp, but you do need the right tools, knowledge, and caution. Mistakes like leaving power on or misconnecting wires can lead to shorts, shocks, or even fire. This guide covers everything you need to know, from verifying power is off to installing your new fixture securely.
Cut Power at the Breaker First
:max_bytes(150000):strip_icc()/inside-electrical-service-panel-load-center-1824663_V1-5527f969fe114ba98f18a9762cb64ab0.png)
Always turn off the circuit at the breaker panel, not just the wall switch. The switch only breaks the hot wire, so power may still be live in the ceiling box. Go to your electrical panel and flip the breaker that controls the fixture.
Find the Correct Breaker
Turn the light on first, then flip breakers one by one until the light shuts off. This trial-and-error method ensures you have the right circuit. Label the breaker once identified for future reference.
Verify Power Is Off with a Tester
Use a non-contact voltage tester or digital multimeter to check both the black and white wires inside the junction box. Hold the tester near each wire. No beep or light means power is off. Test again after removing the old fixture and before handling any wires. If the tester activates, return to the panel and try a different breaker.
Remove the Old Fixture Safely
Use a sturdy ladder and support the fixture with one hand while loosening mounting screws with the other. Heavy or awkward units can fall and damage wires or injure you. If the fixture is large, get a helper to hold it while you work.
Take Off Shades and Bulbs First
Remove glass covers, diffusers, or decorative caps to access the mounting hardware. Set bulbs and small parts aside to avoid breakage. This also reduces weight during removal, making the process safer and easier.
Disconnect Wires in Order
Before disconnecting anything, take a photo of the wiring setup. This helps when connecting the new fixture later. Unscrew wire nuts and separate the black hot wire, white neutral wire, and bare copper or green ground wire. Gently pull the wires apart without yanking, as this can damage insulation or loosen house wiring in the box.
Remove the Mounting Plate
Unscrew the old mounting bracket or crossbar from the electrical box. Carefully lower the fixture and set it aside. Keep the old screws in case the new fixture needs similar hardware.
Inspect the Junction Box
The junction box must be firmly attached to a ceiling joist or support brace. If it wobbles or shifts, do not proceed. A loose box cannot safely support a fixture and may cause a fire or fall. For heavy fixtures over 35 pounds, install a weight-rated ceiling box designed for that load.
Check Wiring Type and Age
Look at the cable entering the box. Cloth-covered wires are common in homes before the 1980s and are rated for 60°C, which is lower than modern standards. Plastic-jacketed NM cable marked NMB is rated for 90°C and safe with most modern bulbs. Only NMB meets current temperature ratings.
Verify Grounding Is Present
Check for a bare copper or green ground wire. If absent, the system may be ungrounded, which is a safety risk. If the box is metal, ensure it is grounded via a grounding screw. The new fixture must also be bonded to this point.
Upgrade Wiring in Older Homes
In pre-1985 homes, replace the last 18 to 24 inches of old cloth wiring with new 90°C-rated NMB cable. This protects the fixture connection from heat damage and creates a code-compliant connection.
Splice in Modern NMB Cable
Pull new NMB cable into the junction box. Connect black to black, white to white, and ground to ground using wire nuts. Attach the new fixture to the new cable, not the old wires. This step is essential for safety, even when using low-heat LED bulbs.
Can You Use LED Bulbs with Old Wiring
Yes, but only as a temporary fix. LEDs reduce heat, but if someone installs a high-wattage bulb later, the old insulation can melt. The real solution is upgrading the wiring near the fixture.
Prepare the New Fixture
Read the manufacturer instructions first. Every fixture has unique mounting hardware. Some use twist-lock systems, others require canopy screws. Understand how the mounting bracket, canopy, and wiring compartment go together before starting.
Install Bulbs Before Mounting
Place bulbs in the fixture on the ground. This avoids fumbling overhead and reduces strain on wires during installation. Use LED bulbs that do not exceed the fixture is max wattage.
Trim and Strip Wires if Needed
If the fixture wires are too long or thick, trim them so they fit neatly in the junction box. Strip about 1 inch of insulation using wire strippers. Avoid nicking the copper, as this weakens the connection and increases fire risk.
Install the Mounting Bracket
Most fixtures include a mounting bracket or crossbar. This supports the fixture weight, not the wires. Align it with the screw holes in the electrical box. If the old plate is still there, remove it.
Secure with Screws
Use the provided screws to attach the bracket. Partially tighten them so the bracket stays in place but allows slight adjustment. This lets you rest the fixture while connecting wires, which is especially helpful when working alone.
Connect the Wires Correctly
Connect black to black, white to white, and green or bare copper to bare copper. Never reverse hot and neutral, as this can create shock hazards even when the switch is off.
Twist and Secure with Wire Nuts
Twist exposed copper ends together clockwise. Screw on a wire nut until tight. Tug gently to ensure wires do not pull out. Wrap connections with electrical tape for extra security. Tuck wires into the box, keeping exposed parts separated to prevent shorts.
Ground the Fixture Properly
Attach the fixture ground wire to the grounding screw on the bracket or to the house ground wire with a wire nut. If the box is metal and grounded, the bracket must also be grounded. Never leave the ground wire unconnected.
Mount the New Fixture
Lift and align the fixture with the bracket, then lock or tighten using the manufacturer method. Methods vary between screw-in arms, twist-lock base, canopy screw, and push-lock systems.
Avoid Pinched Wires
Before final tightening, check that no wires are trapped between the fixture and ceiling. This can damage insulation or cause a short. Tuck wires fully into the box and rotate the fixture slowly.
Align and Level the Fixture
If the fixture looks crooked, loosen the bracket slightly and reposition. Most fixtures allow small adjustments. Use a small level if precision matters, such as with linear fixtures.
Finish and Test the Installation
Snap on glass shades, diffusers, or decorative caps. Some modern fixtures use tool-free clips or magnetic covers. Ensure all parts are secure to prevent falling.
Install Final Bulbs
Use bulbs within the fixture wattage rating. Prefer LEDs for lower heat and energy use. For vintage-style fixtures, Edison LEDs offer aesthetic appeal with modern efficiency. Never exceed max wattage, even with LEDs.
Touch Up the Ceiling
Inspect around the canopy for scuff marks or paint damage. Apply a small amount of matching ceiling paint for a clean finish. Use a fine brush and let dry before turning on the light.
Restore Power and Test
Go back to the electrical panel and flip the breaker back on. Flip the wall switch. If the light turns on, check for flickering or buzzing, which are signs of loose connections.
Troubleshoot If Light Does Not Turn On
If the light does not turn on, turn the breaker off and recheck all wire connections, especially black to black. Verify bulbs are seated properly. Test with a voltage tester. Most dead fixtures are due to loose wire nuts.
When to Call an Electrician
Call a licensed electrician if the junction box is loose or not secured to a joist, if the home has knob-and-tube or aluminum wiring, or if you are installing a heavy fixture over 35 pounds. These situations require professional handling.
Signs You Need Professional Help
Look for discolored wires, brittle insulation, or burn marks on the box. These indicate past overheating. Extra wires you do not understand, such as red wires or multiple cables, also mean complex circuits that require a professional.
Tools and Supplies Needed
You will need a ladder or step stool, screwdriver (Phillips and flathead), wire strippers, non-contact voltage tester, wire cutters, and a headlamp for dark ceilings. Required supplies include the new ceiling lamp, wire nuts (usually included), electrical tape, LED bulbs, and ceiling paint for touch-ups.
Time, Difficulty, and Expectations
A standard replacement takes 30 to 60 minutes. With a wiring upgrade, expect 60 to 90 minutes. Having a helper makes the job faster, especially for heavy fixtures. The difficulty level is moderate, requiring basic electrical knowledge.
Key Safety Takeaways
Always test for voltage, even if you are sure the breaker is off. Upgrade old 60°C wiring by splicing in NMB-rated cable. Ground every fixture without exception. The junction box must support the fixture weight, never the wires. Use bulbs that do not exceed max wattage. Take photos before disconnecting to ensure easy reconnection.
Frequently Asked Questions About Changing a Ceiling Lamp
Can I install a ceiling lamp myself
Yes, most homeowners can safely replace a ceiling fixture if they follow safety protocols, use a voltage tester, and understand basic wiring. The key steps are cutting power at the breaker, verifying no voltage, and connecting wires correctly by color.
Do I need an electrician to replace a ceiling light
Not always. DIY is fine for like-for-like replacements with intact wiring. Call an electrician for structural box issues, heavy fixtures, unfamiliar wiring, or code upgrades in older homes.
Which wires connect to which when changing a ceiling lamp
Connect black (fixture) to black (ceiling) for hot, white to white for neutral, and green or bare copper to bare copper for ground. Always consult the manufacturer instructions for specific guidance.
How long does it take to change a ceiling lamp
A simple replacement takes 30 to 60 minutes. With a wiring upgrade in older homes, expect 60 to 90 minutes. Having a helper speeds up the process for heavy fixtures.
What should I do if my light does not turn on after installation
Turn the breaker off and recheck all wire connections. Ensure no wire nuts are loose and that black hot wires are properly connected. Verify bulbs are seated correctly and test with a voltage tester before restoring power.
When should I call an electrician for ceiling lamp replacement
Call an electrician if the junction box is loose or damaged, if the home has knob-and-tube or aluminum wiring, if you are installing a heavy chandelier over 35 pounds, or if you see signs of heat damage like discolored wires or burn marks.
Final Thoughts on Changing Your Ceiling Lamp
Changing a ceiling lamp is a rewarding DIY project that enhances both function and style in your home. With the right precautions, tools, and knowledge, most homeowners can complete this task safely. Always prioritize safety by cutting power at the breaker and verifying with a voltage tester before touching any wires.
The most critical steps are inspecting the junction box for security, upgrading wiring in older homes, and ensuring proper grounding. These measures prevent fire hazards and electrical shocks. When in doubt, especially with old wiring, heavy fixtures, or structural issues, call a licensed electrician. Your safety is worth more than any shortcut.