
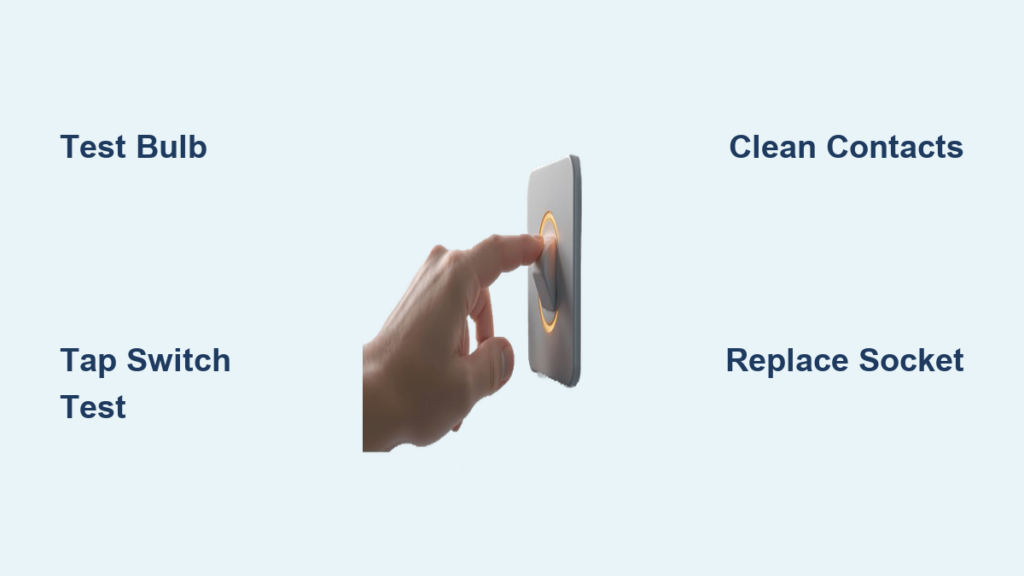
Is your lamp not turning on, flickering, or only working when you wiggle the switch? You’re not alone. A lamp switch not working is one of the most common household electrical issues, and in most cases, it’s an easy fix you can do yourself in under 30 minutes. Whether it’s a table lamp, floor lamp, touch lamp, or vintage fixture, this guide will help you diagnose the exact cause and repair it safely.
We’ll walk you through identifying symptoms, testing components, cleaning contacts, and replacing faulty switches, all with basic tools and no electrical expertise required. You’ll save money, reduce waste, and restore your lamp to full function.
Identify the Problem Before Repairs
Before taking anything apart, rule out simple causes that mimic a bad switch.
Rule Out Bulb and Outlet Issues
Start with the basics to avoid unnecessary disassembly. Replace the bulb with a known-working one, because even new bulbs can fail unexpectedly. Test the outlet with another device like a phone charger to confirm it has power. If the outlet doesn’t work, the issue is there, not the lamp. Try the lamp in a different outlet to confirm power delivery.
Perform the Tap Test
Plug in the lamp and turn the switch on. Gently tap the switch housing or base with your hand. If the light flickers or turns on when tapped, you likely have loose internal contacts or a failing switch. This is a strong sign the switch needs cleaning or replacement.
Inspect for Visible Damage
Unplug the lamp and perform a visual check before proceeding with any repairs.
Look for Burn Marks or Melting
Examine the switch housing, the socket, and the power cord near the plug and base. Look for brown or black discoloration, soft spots in the cord, or melted plastic. Stop immediately if you see any of these signs. This indicates overheating and a potential fire hazard. Replace the socket or consult an electrician.
Examine the Power Cord
Run your fingers along the entire cord to feel for kinks, fraying, or cuts. Check where it bends at the plug and lamp base, as these are common stress points. A damaged cord can interrupt power and mimic switch failure. If damaged, replace the cord or the entire lamp if repair isn’t safe.
Test and Clean Electrical Contacts
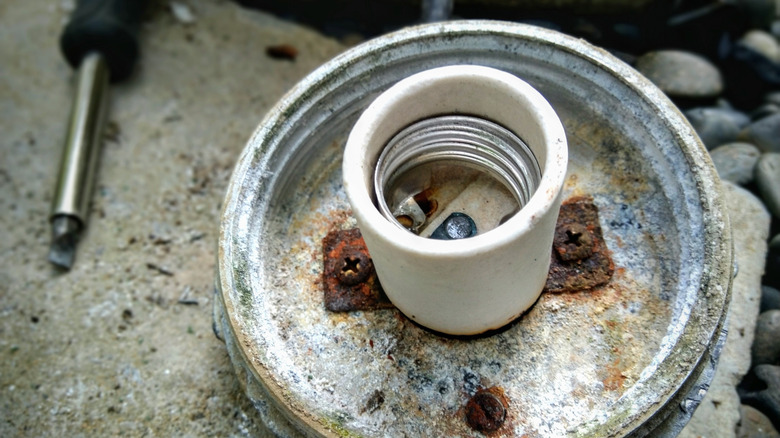
Sometimes oxidation or dirt causes poor connection, and cleaning restores function without replacement.
Access the Socket Terminals
Unplug the lamp and remove the bulb and shade. For most lamps, unscrew the outer shell or gently pull the socket apart. You’ll see two screw terminals: brass (hot) and silver (neutral).
Clean the Center Contact Tab
At the bottom of the socket is a small brass tab. Over time, it can flatten or corrode. Using a small screwdriver, gently bend the tab upward about 1/8 inch so it makes firm contact with the bulb. Clean it with a cotton swab dipped in rubbing alcohol.
Clean the Screw Terminals
Use fine-grit sandpaper (200-400 grit) or a non-metallic scrub pad like Scotch-Brite. Scrub the brass and silver terminals until shiny to remove oxidation that blocks current.
Spray Contact Cleaner
For rotary or push switches, spray electrical contact cleaner into the switch mechanism. Work the switch back and forth to distribute the cleaner. Let it dry for 10-15 minutes before reassembly.
Replace the Lamp Switch
If cleaning doesn’t work, replace the switch. Most lamp switches are integrated into the socket or base.
Choose the Right Replacement
Buy a new socket with built-in switch (cost: $2-$5). Available at hardware stores, Amazon, Ace Hardware, and lamp supply shops. Match the type: standard on/off, pull-chain, rotary (twist), or 3-way if your lamp has multiple brightness. Ensure it’s rated for 125V, 6A (up to 600W), which is standard for household lamps.
Replace a Socket with Built-In Switch
This is the most common repair method for table and floor lamps.
Tools You’ll Need
- Phillips screwdriver
- Wire cutters/strippers
- Replacement socket
Disassemble the Lamp
Unplug the lamp and remove the bulb, shade, and harp. Remove the old socket by squeezing the sides and pulling up, or unscrew the outer knob counterclockwise. Remove the retaining screw holding the socket to the stem.
Disconnect the Wires
Loosen the brass and silver screws. Pull out the wires. If they’re stuck, cut them close to the old socket to preserve length.
Prepare the Wires
Strip 1/2 inch (1.3 cm) of insulation from each wire end. Avoid nicking the copper strands.
Connect to the New Socket
Thread wires through the new base. Black (hot) goes to the brass screw. White (neutral) goes to the silver screw. Wrap wires clockwise around screws so they tighten as you screw down. Tighten firmly and do a gentle tug test to confirm no slippage.
Reassemble and Test
Snap the socket housing back in place. Reattach any knobs or covers. Reinstall the bulb and shade. Plug in and test. If it works, you’re done.
Replace a Cord (Inline) Switch
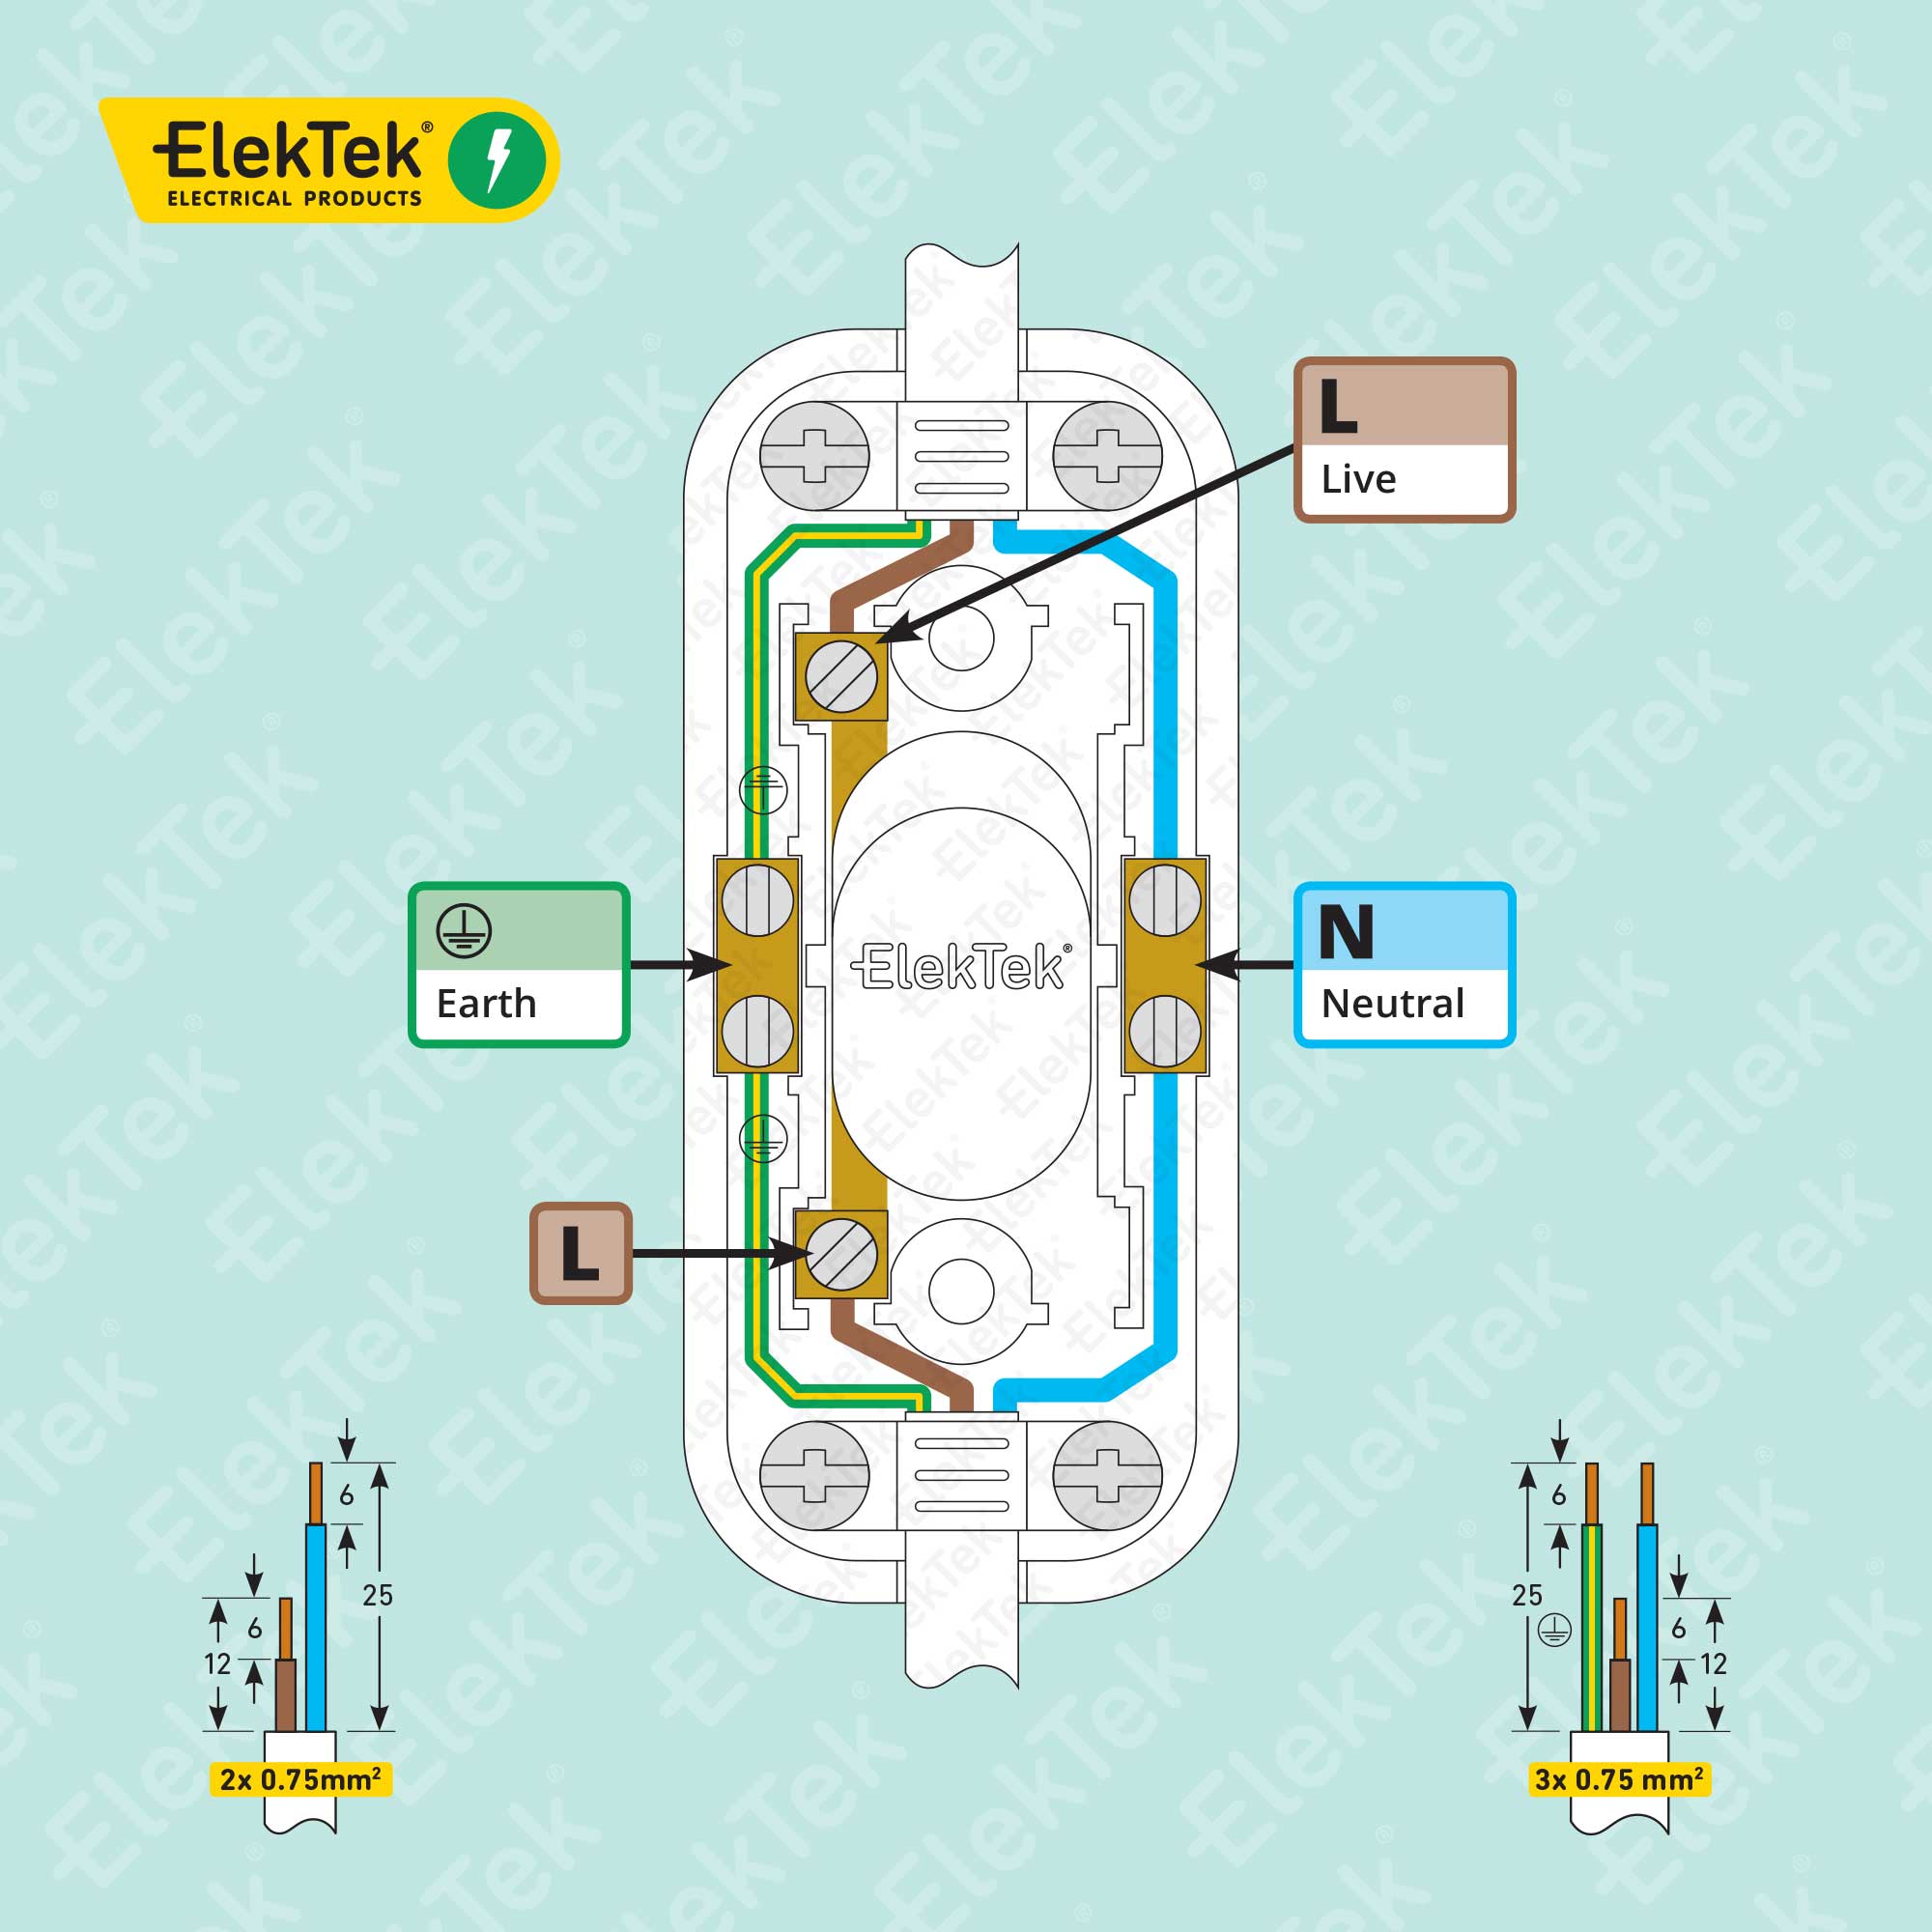
For lamps with a switch on the cord rather than the socket, follow this procedure.
Identify Your Cord Type
Check the cord for printing. SPT-1 is thinner (common in lightweight lamps). SPT-2 is thicker (used in heavier lamps). Buy a matching inline switch.
Install the New Switch
Unplug the lamp. Cut out the old switch, leaving enough wire to work with. Strip 1/2 inch from each wire end. Connect the hot wire (smooth insulation) to the brass screw and the neutral wire (ribbed or striped) to the silver screw or channel. Close the housing securely. Ensure no bare wire is visible. Test the lamp.
Fix Touch and Dimmer Lamps

Specialty lamps require different approaches than standard switches.
Touch Lamp Not Responding
Unplug for 10 minutes to reset the circuit. Try a different bulb because some LEDs interfere with touch sensors. If still unresponsive, the internal circuit board is likely faulty. Replacement boards cost $5-$10 online. Replace following manufacturer instructions.
Dimmer Lamp Stuck at One Brightness
The dimmer module has failed. Most are not repairable. Replace the entire socket or switch unit. Consider upgrading to a modern LED-compatible dimmer if using LED bulbs.
Avoid Common Mistakes
Even experienced DIYers make these errors that cause repair failure or safety hazards.
Reversed Polarity
Connecting hot and neutral wires backward can create a shock hazard, even when the lamp is off. Hot wire goes to brass screw. Neutral wire goes to silver screw. On the plug, neutral connects to the wider blade.
Loose Wire Connections
A loose screw causes arcing, heat, and flickering. Tighten screws firmly and tug-test each wire after connection.
Using Wrong Bulb Wattage
Exceeding the socket’s wattage rating causes overheating. Always check the label on the socket. Use bulbs at or below the max (e.g., 60W max). Switch to LED bulbs because they use less power, generate less heat, and last longer.
When to Call a Professional
Don’t attempt repairs if the lamp has vintage cloth-insulated wiring, which is brittle and unsafe. You should also stop if you see melting, burn marks, or smell smoke because this indicates fire risk. Don’t repair lamps using a transformer or electronic circuit like low-voltage halogen. If you’re unsure about wiring, better safe than sorry. A licensed electrician can rewire or restore vintage lamps safely.
Prevent Future Switch Failures
Keep your lamp working longer with simple care and maintenance.
Regular Maintenance
Every 6-12 months, inspect the cord and plug. Clean the socket and switch. Check the center contact tab for proper tension.
Use LED Bulbs
LEDs draw less current and reduce stress on switches and sockets. They also generate less heat, which extends component life.
Don’t Yank the Cord
Always use the switch to turn off the lamp. Pulling the cord strains internal wires and can cause intermittent connections or complete failure.
Replace Worn Switches Early
If a rotary switch feels stiff or a push switch clicks weakly, replace it before it fails completely. Early intervention prevents complete failure.
Final Thoughts on Fixing a Lamp Switch Not Working
A lamp switch not working is rarely a reason to throw out a lamp. In most cases, a $3 part and 20 minutes of your time is all it takes to bring it back to life. The key steps are: diagnose the problem systematically, clean contacts first if the issue is intermittent, and replace the socket or switch if cleaning doesn’t resolve the issue. Always observe safety precautions by unplugging before working and using UL-listed replacement parts.
Your lamp isn’t broken. It’s just waiting to be fixed. With the right approach and basic tools, you can restore nearly any lamp to full function.
Frequently Asked Questions About Lamp Switch Not Working
Why does my lamp only work when I tap it?
This indicates loose internal contacts or a failing switch mechanism. The tapping temporarily reestablishes electrical connection. Clean the contacts or replace the switch to fix this permanently.
Can I replace just the switch without replacing the whole socket?
Most modern lamps have switches integrated into the socket assembly. You’ll need to replace the entire socket unit, which includes the switch. These cost $2-$5 at hardware stores.
How do I know if the outlet is the problem?
Test the outlet with another device like a phone charger. If that device doesn’t work either, the outlet is dead, not your lamp. Try a different outlet to confirm.
Is it dangerous to repair a lamp switch myself?
No, if you unplug the lamp first and follow basic safety rules. Never work on a plugged-in lamp. Use insulated tools and work in a dry area. If you see burn marks or melting, stop and call an electrician.
How long does a replacement lamp switch last?
A properly installed replacement socket or switch lasts 5-7 years with normal use. Higher-quality ceramic-insulated sockets can last even longer.



