
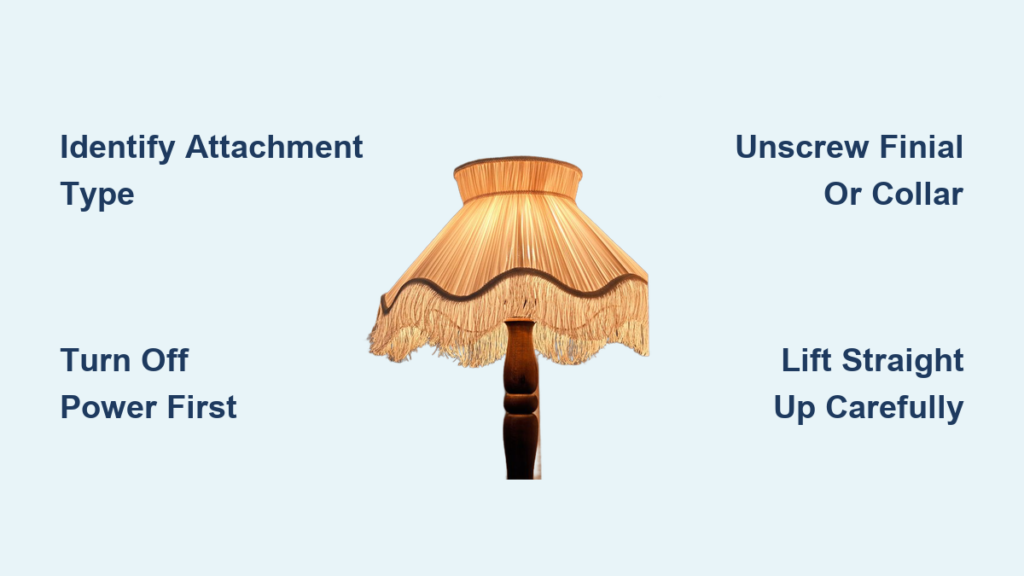
Changing a lamp shade can instantly refresh your space, but the first step removing the old one often stumps even experienced DIYers. Whether you are upgrading a table lamp, cleaning a ceiling fixture, or repairing a chandelier, knowing how to remove a lamp shade safely and correctly is essential. The method varies widely depending on the fixture type and attachment system.
Most people assume all shades simply lift off, but forcing it can crack glass, strip threads, or damage delicate sockets. Instead, identifying your lamp mounting mechanism is key. From finials and harps to clip-on designs and threaded collars, this guide walks you through every common system. You will learn exactly what tools to use, how to avoid common mistakes, and what to do when a shade will not budge.
Identify Your Lamp Shade Attachment Type
:max_bytes(150000):strip_icc()/SPR-types-of-lamp-shade-6386634-diagram-5d7d9c83efa14c03ad8bd135f119c487.jpg)
Before touching any hardware, determine how your shade is secured. Using the wrong method risks breakage. A quick visual inspection usually reveals the mechanism.
Quick Identification Guide
Look for these visual clues to identify your attachment type:
• Decorative knob on top means Harp and Finial
• U-shaped metal wire under the shade indicates Harp system
• Shade clips directly to the bulb means Clip-On
• Ring screws around the base indicates Threaded Collar
• Visible screws at the base means Screw-Mounted
• Shade fits over socket with no harp indicates Uno Fitter
• Tight friction fit with no hardware means Direct/Friction Fit
• Modular bracket with tabs indicates Detachable Holder
If unsure, refer to manufacturer instructions or model-specific guides. Never force removal. Double-check all fasteners are loosened first.
Remove a Harp and Finial Lamp Shade
This is the most common setup for standard table and floor lamps. It uses a U-shaped harp and a decorative finial to hold the shade in place.
Unscrew the Finial
Follow these steps to remove the finial:
- Turn off the lamp and let the bulb cool completely.
- Grip the finial (the knob on top) with your fingers firmly.
- Turn counterclockwise to unscrew it from the harp.
- If stuck, wrap a soft cloth or rubber grip pad around it for more traction.
- Set the finial aside in a safe place. It is small and easy to lose.
- Avoid using pliers unless covered. They can scratch or crack decorative finishes.
Lift Off the Shade
Once the finial is removed, follow these steps:
- Grasp the shade gently with both hands for support.
- Lift straight up off the harp wires carefully.
- If tight, wiggle slightly side to side while lifting.
- Never pull at an angle. This can bend the harp permanently.
Remove the Harp (Optional)
If you need to remove the harp itself, follow these steps:
- Squeeze the two feet of the U-shaped harp together firmly.
- Lift upward to disengage from the harp saddle on the lamp base.
- Some harps are permanently attached. Do not force if it does not release.
Remove a Clip-On Lamp Shade

Clip-on shades are common in chandeliers, sconces, and pendant lights. These shades attach directly to the bulb with spring-loaded clips.
Turn Off Power First
Before starting, follow these safety steps:
- Switch off the circuit breaker or wall switch.
- Even low-wattage bulbs pose electrical risks if broken.
- Let the bulb cool completely before touching.
Squeeze and Lower the Shade
Follow these steps to remove the shade:
- Support the shade with one hand to prevent dropping.
- Gently squeeze the metal or plastic clips inward. Clips are usually near the top inner rim.
- Pull the shade straight down off the bulb.
- The shade should release smoothly once clips compress.
- If resistance occurs, ensure all clips are fully disengaged.
Reinstall Clip-On Shades
When putting the shade back on, follow these steps:
- Align clip openings with the bulb base precisely.
- Press upward until clips snap into place securely.
- Ensure the shade sits level. Misalignment can cause flickering or poor contact.
Remove a Threaded Collar Lamp Shade
This system is used in flush-mount or semi-flush ceiling lights. A screw-on ring secures a dome or globe shade.
Shut Off Power at Breaker
Follow these electrical safety steps:
- Turn off electricity at the circuit panel. Do not rely on the wall switch.
- Test the fixture with a voltage tester to confirm it is dead.
- This step is critical for ceiling-mounted fixtures.
Remove the Bulb First
Follow these steps for better access:
- Unscrew the bulb and set it aside in a safe place.
- This provides clearer access to the collar mechanism.
- Keep the bulb clean and undamaged for reinstallation.
Unscrew the Collar
Follow these steps to remove the collar:
- Grasp the fixture body (not the wires) to stabilize it.
- Turn the metal or plastic collar counterclockwise firmly.
- It may be tight. Use a soft cloth for grip if needed.
- Once loose, remove the collar and set it aside carefully.
Lower the Shade Carefully
Follow these steps to remove the shade:
- With the collar removed, gently lower the shade downward.
- Some require slight downward pressure to clear internal tabs.
- Hold both sides firmly. Glass domes are fragile and can crack.
- Set the shade down on a soft surface.
Remove a Screw-Secured Lamp Shade
Some older or custom lamps use small screws to lock the shade in place. This method is less common but found in vintage fixtures.
Locate the Set Screws
Follow these identification steps:
- Inspect the base of the shade or socket collar carefully.
- Look for tiny screws. They are often Phillips or flathead, sometimes miniature.
- Some vintage lamps have screws inside the socket. Check thoroughly.
Loosen Screws and Remove Shade
Follow these removal steps:
- Use the correct screwdriver to turn screws counterclockwise.
- Loosen completely. Do not remove unless necessary.
- Gently lift or slide the shade off the mount.
- Place screws in a labeled bag. Losing them makes reassembly difficult.
Reinstall Screw-Mounted Shades
Follow these reinstallation tips:
- Align the shade properly before tightening any screws.
- Tighten screws evenly to prevent cracking porcelain or plastic.
- Do not over-tighten. Snug is sufficient.
Remove a Direct-Fit or Friction-Fit Lamp Shade
These shades are found in minimalist or contemporary fixtures. They slide or twist directly onto a rod or socket without additional hardware.
Support the Shade
Follow these initial steps:
- Use both hands to support the weight from the start.
- Do not pull straight down. Many require a twist mechanism.
- Assess whether the fit is threaded or friction-based first.
Twist and Release (If Threaded)
For threaded designs, follow these steps:
- Turn counterclockwise while applying gentle downward pressure.
- Once loose, pull straight down carefully.
- Do not force the twist if resistance is felt.
Wiggle and Pull (If Friction-Fit)
For friction-fit designs, follow these steps:
- Gently wiggle side to side while pulling downward steadily.
- Avoid jerking movements. This can damage the socket or mounting rod.
- Work slowly to prevent sudden release and dropping.
Remove an Uno Fitter Lamp Shade
This system is common in compact or modern lamps. It eliminates the harp by attaching the shade directly to the socket.
Unscrew the Socket Cap
Follow these steps to access the shade:
- Locate the retaining nut or cap on the side or top of the socket.
- Turn counterclockwise with fingers or a wrench if metal.
- Some caps are plastic. Avoid excessive force to prevent cracking.
- Set the cap aside safely for reinstallation.
Slide Shade Off
Follow these removal steps:
- Once the cap is removed, slide the shade downward off the socket.
- Handle glass shades with extra care to prevent breakage.
- Support the shade fully during removal.
Reinstall Uno Fitter Shades
Follow these reinstallation steps:
- Slide the shade up into position on the socket.
- Reattach and hand-tighten the socket cap securely.
- Ensure it is secure but not over-tightened.
- Never leave the socket cap loose. This can create a fire hazard.
Handle Specialized Fixtures and Brackets
Some lamps use modular or recessed mounting systems, especially in track or commercial lighting.
Detachable Holder with Tabs
For bracket-style holders, follow these steps:
- Push the tabs upward to release from the frame.
- Slide the entire unit down and out carefully.
- Support the weight throughout removal.
Reattach the Bracket
Follow these steps for proper reinstallation:
- Slightly bend tabs outward for proper alignment with slots.
- Align tabs with slots in the frame precisely.
- Press down firmly until you hear a click indicating secure fit.
- Test the fit by gently pulling to ensure it is locked.
Troubleshoot Stuck or Stubborn Shades
Even after removing fasteners, some shades refuse to budge. Here is how to handle stubborn cases.
Double-Check All Fasteners
Follow these verification steps:
- Confirm finial, screws, or collar are fully removed.
- Inspect for hidden set screws. Some vintage lamps have them inside the socket.
- Look for additional clips or mechanisms not initially visible.
Apply Gentle Rocking Motion
Follow these techniques to free stuck shades:
- Wiggle the shade side to side while lifting upward.
- This breaks adhesive buildup or thermal expansion bonds.
- Work slowly and patiently. Force causes damage.
Improve Grip Safely
Follow these grip improvement tips:
- Wrap fingers in a soft cloth or rubber gloves.
- This increases traction without scratching finishes.
- Avoid using metal tools on delicate surfaces.
Use Silicone Lubricant (Last Resort)
If all else fails, try this approach:
- Apply a tiny amount of silicone lubricant to the contact point.
- Avoid electrical parts completely during application.
- Wait 5 minutes, then try removing again.
- Never use WD-40 or oil-based sprays. They conduct electricity and degrade plastics.
Clean and Inspect After Removal
Once the shade is off, take the opportunity to maintain the fixture properly.
Clean the Shade
Follow material-specific cleaning tips:
• Glass: Wipe with glass cleaner and microfiber cloth
• Fabric: Spot clean or vacuum gently with soft brush attachment
• Paper or Parchment: Dust with soft brush only. Avoid moisture
• Metal: Wipe with damp cloth and dry thoroughly
Wipe Down the Fixture
Follow these fixture cleaning steps:
- Use a dry or slightly damp cloth on the base and socket.
- Avoid abrasive cleaners on metal or painted finishes.
- Clean all dust and debris from contact points.
Check Wiring and Socket
Perform these safety inspections:
- Look for frayed wires or damaged insulation.
- Check for discolored or cracked insulation on wires.
- Ensure all connections are tight and secure.
- Replace damaged sockets immediately. Do not repair with tape.
- Test the switch and plug function properly, especially in older lamps.
Prevent Damage During Reassembly
Reinstalling incorrectly can lead to cracks, flickering, or electrical hazards. Follow these guidelines.
Match Shade to Fixture
Consider these compatibility factors:
• Size: Ensure the shade fits proportionally to the lamp
• Weight: Heavy shades can bend harps or overload sockets
• Fitter Type: Uno, slip, or clip must match exactly
Hand-Tighten Only
Follow these installation best practices:
- Over-tightening finials or collars is a leading cause of breakage.
- Snug is sufficient. No need for tools or excessive force.
- Hand-tighten all fasteners. Never use pliers on finished hardware.
Use Protective Washers
Follow these protective measures:
- Place a shade washer between finial and shade.
- This prevents pressure damage on delicate materials like fabric or parchment.
- Washers are inexpensive and widely available.
Frequently Asked Questions About Removing Lamp Shades
How do I remove a lamp shade that is stuck?
First, double-check that all fasteners are fully removed. Apply a gentle rocking motion while lifting. Improve grip with a soft cloth or rubber gloves. If still stuck, apply a tiny amount of silicone lubricant to the contact point and wait 5 minutes before trying again.
What tools do I need to remove a lamp shade?
Most lamp shades can be removed with just your hands and a soft cloth for grip. A screwdriver may be needed for screw-secured shades. A voltage tester is essential for ceiling fixtures. Rubber grip pads help with stuck finials.
Can I remove a lamp shade without turning off the power?
For table lamps and floor lamps, you can unplug the lamp before removing the shade. For ceiling fixtures, chandeliers, and wall sconces, always turn off power at the circuit breaker. This is critical for safety.
How do I identify what type of lamp shade I have?
Look for visual clues. A decorative knob on top indicates Harp and Finial. Clips on the bulb mean Clip-On. A screw-on ring around the base indicates Threaded Collar. Screws at the base mean Screw-Mounted. No visible hardware with tight fit means Direct/Friction Fit.
Why will my lamp shade not come off?
The most common reasons are incomplete fastener removal, hidden screws, or sticking from age and dust buildup. Check for set screws inside the socket. Apply gentle rocking motion. Use a soft cloth for better grip before forcing.
How do I clean my lamp after removing the shade?
Dust the base and socket with a dry cloth. Wipe with a slightly damp microfiber cloth. Check wiring for damage. Replace any worn sockets. Test the switch and plug before reinstalling the shade.
Key Takeaways for Removing Lamp Shades
Removing a lamp shade does not have to be frustrating. By identifying the attachment type first, whether harp, clip, collar, screw, or direct-fit, you can proceed safely and efficiently. Always turn off power for hardwired fixtures. Support the shade during removal. Never force components.
The most common system uses a harp and finial. Simply unscrew the finial counterclockwise and lift the shade straight up. For clip-on shades, squeeze the clips inward and pull down. Threaded collars require turning counterclockwise to release the ring.
After removal, take time to clean the fixture and inspect wiring. Replace any damaged sockets or frayed wires immediately. Use shade washers during reassembly to protect delicate materials. Hand-tighten all fasteners. Over-tightening cracks glass shades and strips threads.
With these steps, you will protect your fixture, avoid costly mistakes, and make future changes easier. Whether for cleaning, repair, or style updates, you now have the knowledge to handle any lamp shade removal with confidence.



