
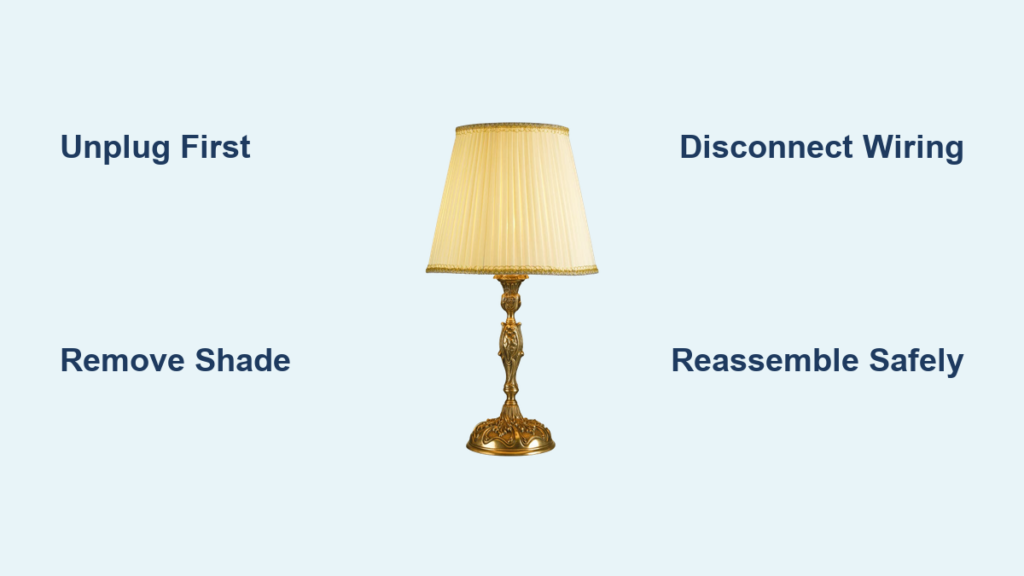
Taking apart a lamp might seem simple, but doing it safely and correctly ensures you can reassemble it without issues, especially when cleaning, rewiring, or restoring older models. Whether you’re working on a vintage table lamp, a modern floor model, or an alabaster standing lamp, understanding the internal components and proper disassembly sequence is crucial. This guide walks you through every step from unplugging the lamp to removing the base while highlighting safety precautions, common pitfalls, and expert tips.
Safety First: Power Down and Protect Yourself
Before touching any part of the lamp, ensure it is completely safe to work on. Electrical safety must be your top priority throughout the entire process of taking apart a lamp.
Unplug or Cut Power
Always unplug the lamp from the wall outlet before starting. If you are working on a hardwired fixture like a chandelier, turn off the circuit breaker and verify power is off using a voltage tester. Never rely solely on a wall switch because only the breaker guarantees full de-energizing.
Wear Protective Gear
Use insulated gloves to protect against accidental contact with live parts in case of faulty wiring. Safety glasses are essential when handling glass shades or brittle materials. A pair of cut-resistant gloves helps when removing sharp metal harps or base components.
Prepare Your Workspace
Work on a clean, flat surface with good lighting. Lay down a soft cloth or towel to prevent scratching delicate finishes. Keep a small tray or magnetic dish nearby to store screws, nuts, and washers. This prevents loss and makes reassembly easier.
Warning: Older lamps, especially those over 40 years old, often have degraded cords, unsafe plugs, or cracked insulation. Assume all vintage lamps need rewiring unless proven otherwise.
Identify Your Lamp Type and Components

Different lamps require different disassembly approaches based on their construction. Understanding what each piece does prevents mistakes during removal.
Know the Lamp Style
Table lamps usually have a base, stem, socket, harp, and finial. Floor or standing lamps may have multiple poles, joints, or arms. Alabaster lamps use a central threaded rod to compress stacked sections. Chandeliers are ceiling-mounted and require full power disconnection. Each type shares core electrical components but varies in assembly method.
Recognize Key Parts
Familiarize yourself with these common elements before you start taking apart a lamp:
- Socket: Holds the bulb and switch
- Harp: Wire frame that supports the shade
- Finial: Knob that secures the shade to the harp
- Cord: Two-wire cable where ribbed equals neutral and smooth equals hot
- Threaded rod: Central support in alabaster or vintage lamps
- Loader: Cast-iron weight inside the base guiding the cord
Pro Tip: Take photos at each step. They will help during reassembly, especially if wires or parts are confusing.
Remove the Lampshade and Bulb
Start disassembly by safely removing external components. This is the first step when taking apart a lamp for any reason.
Take Off the Shade
Most shades are held by a finial. Turn it counterclockwise to unscrew and lift the shade off. For clip-on shades, which are common in swing-arm lamps, gently squeeze the metal clips and slide the shade out. Handle glass, fabric, or parchment shades with care and place them upside down on a soft surface to avoid warping or cracking.
Uninstall the Light Bulb
Unscrew the bulb carefully. If it is stuck, wear gloves for grip or use a rubber jar opener. Inspect the bulb for cloudiness, dark spots, or broken filament, and replace if damaged.
Caution: Do not test the lamp with a damaged bulb because it can overheat or shatter.
Detach the Harp from the Socket
The harp must come off before accessing the socket assembly. This is a crucial step when learning how to take apart a lamp properly.
Check for a Set Screw
Look at the bottom of the harp where it meets the socket base. Some models have a small set screw, so loosen it with a Phillips screwdriver. Once loose, lift the harp straight up.
Remove Friction-Fit Harps
If no screw is present, the harp is press-fit. Gently twist and pull upward while squeezing the wires slightly to release it from the base slots. Inspect the harp for bends or corrosion because a warped harp will not hold the shade evenly and should be replaced.
Common Mistake: Forcing the harp can crack the socket base. Apply steady, gentle pressure instead.
Disassemble the Socket Assembly
The socket houses the switch and wiring, so handle it carefully during the process of taking apart a lamp.
Remove the Socket Cap
Most socket caps unscrew counterclockwise. Grip the seam line and twist. In some models, especially older ones, the cap may pop off with a twist-and-pull motion. If there is a set screw on the side, loosen it first before attempting removal.
Take Out Internal Components
Once the cap is off, remove the cardboard insulator, which is a cylindrical sleeve around the wires. Slide off the outer shell, which is usually brass or ceramic. Extract the socket switch mechanism, noting its orientation. Some sockets have a press marking, so squeeze the sides to release from the stem.
Expert Note: Vintage sockets often have brittle insulation. Replace if cracked or discolored.
Disconnect and Inspect the Wiring

Now you can access the wires for inspection or replacement. This step is essential when taking apart a lamp for rewiring.
Loosen Terminal Screws
Inside the socket, you will find two screws. The gold brass screw connects to the hot wire, which is the smooth side of the cord. The silver screw connects to the neutral wire, which is the ribbed side of the cord. Loosen both screws and pull the wires free. Take note of which wire went where because this is critical for safe reassembly.
Examine the Cord Condition
Check the entire length for fraying or cracking, exposed copper, or brittle insulation. If the cord shows any damage or if it is over 20 years old, replace it. Use 18 AWG SPT-1 or SPT-2 cord, which is the standard for lamps.
Red Flag: A cord shorter than 8 feet may indicate a past amateur repair. Replace it with a full-length, UL-listed cable.
Remove the Threaded Rod and Base Assembly
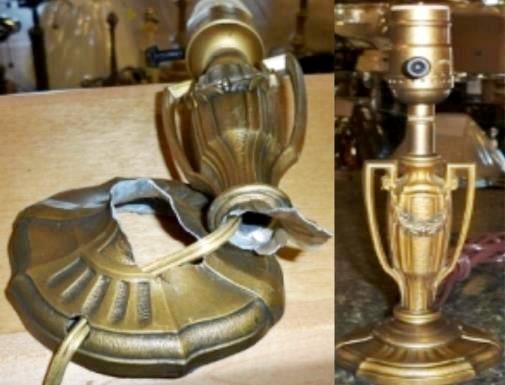
For deep cleaning or rewiring, remove internal components from the base. This step applies when taking apart a lamp with a threaded central support.
Peel Off the Felt Pad
Flip the lamp over and gently peel off the felt pad from the base bottom. Use a plastic scraper or old credit card to remove adhesive residue. Clean the area with mild soap and water or adhesive remover.
Extract the Cord and Rod
Feed the cord upward through the base until the threaded rod comes free. In alabaster or vintage lamps, this rod runs through the center and holds everything together. Remove the nut and lock washer from the top, the harp base, and the loader, which is a cast-iron weight inside the base. Keep all washers and spacers organized for reassembly.
Inspect Bushings and Clamp
Alabaster lamps use plastic or fiber bushings at the top and bottom of the rod to protect the cord from metal edges. Check for cracks or wear. Also, confirm the cable clamp inside the base is intact because it prevents strain on the wires.
Pro Tip: Thread the replacement nut onto the new cord before feeding it through the base. This saves time during reassembly.
Disassemble the Base (If Needed)
Only disassembly the base for major repairs or deep cleaning. This is not always necessary when taking apart a lamp.
Remove Base Fasteners
Look for screws on the bottom or sides of the base. Use a screwdriver or socket wrench to remove them. Some decorative knobs or trim pieces hide screws, so remove those first. Gently separate the base halves and avoid prying with metal tools, which can scratch or crack ceramic or resin bases.
Clean and Dry Thoroughly
Wipe out dust and debris with a damp cloth. For sticky residue or old wax, use a mild degreaser. Let the base dry completely before reassembly because moisture near wiring is dangerous.
Note: Do not submerge any part of the base if it contains metal or electrical pathways.
Clean and Inspect All Parts
Now that everything is apart, clean and evaluate each component. This is the perfect time to assess what needs replacing.
Wipe Down Metal and Ceramic
Use a soft cloth for routine cleaning. For tarnished brass, apply metal polish and buff gently. Avoid abrasive pads that scratch finishes.
Check for Wear and Damage
Go through this checklist when taking apart a lamp:
- Socket: Cracks, loose terminals, or corroded contacts
- Switch: Does it click smoothly? Replace if stiff or noisy
- Harp and finial: Bent or stripped threads
- Plug: Is it polarized? Replace non-polarized or cracked plugs
- Cord: Any signs of heat damage like melting or discoloration
Any questionable part should be replaced because safety comes first.
Expert Insight: The plug is at least 40 years old and less safe than current plugs, so they all need to go.
Reassemble the Lamp Safely
Once cleaned and inspected, it is time to put everything back. Follow these steps in reverse order when taking apart a lamp.
Feed the New Cord
If replacing the cord, thread it through the base, the loader, the threaded rod, and up to the socket. Ensure enough slack at the top for wiring.
Tie a Lineman’s Knot
This strain relief knot prevents wire pull at the terminals. Wrap the hot smooth wire down and behind the cord. Wrap the neutral ribbed wire down and in front. Pass each end through the opposite loop and pull tight. The knot should sit just below the socket base.
Why it matters: Without strain relief, tugging the cord can loosen connections and create fire hazards.
Wire and Reinstall the Socket
Now connect the wires properly to complete the process of taking apart a lamp.
Connect to Terminal Screws
Match the smooth hot wire to the gold screw and the ribbed neutral wire to the silver screw. Strip about one-half inch of insulation, loop the wire clockwise around the screw, and tighten securely. Tug gently to ensure it will not pull out.
Reattach Socket Components
Slide the cardboard insulator over the wires, then reinstall the outer shell, socket cap, and harp base. Make sure no bare wire is exposed.
Code Tip: Always use a polarized plug where the wider blade connects to the neutral ribbed wire.
Final Assembly: Harp, Shade, and Finial
Put the lamp back together in reverse order to finish taking apart a lamp.
Install the Harp
Insert the harp legs into the base slots. If it has a set screw, tighten it now. Ensure the harp stands straight and does not wobble.
Add the Shade and Finial
Place the lampshade on the harp wires. Screw on the finial by hand because do not over-tighten, as this can crack the socket or shade.
Aesthetic Tip: Match finial style to the lamp era. Brass for vintage and modern for contemporary.
Test Before Finalizing
Never skip this step when taking apart a lamp.
Plug In and Power On
Insert a bulb and plug in the lamp. Turn it on and check whether it lights immediately, if there is flickering or buzzing, and if the switch operates smoothly. If not, unplug and recheck wire connections, socket alignment, and switch function.
Troubleshooting: If the lamp does not turn on, verify the bulb works and the switch is properly seated.
Special Cases: Chandeliers and Floor Lamps
Some lamps require unique steps when taking them apart.
Disassemble a Chandelier
Turning off power at the breaker is the first step. Remove all bulbs. Unscrew the decorative canopy. Detach arms with nuts or screws. Cut wires only if necessary, leaving slack for reconnection. Work with a partner because chandeliers are heavy and fragile.
Take Apart a Floor Lamp
Unplug and remove shade and bulb. Loosen harp set screw and remove harp. Pull out socket assembly from the pole. Unscrew socket ring and extract wiring. Some floor lamps have articulating arms, so label each joint during removal.
Vintage Alert: Look for manufacturer marks like accurate casting co. They help identify age and value.
Tools You Will Need
Use the right tools for a smooth process when taking apart a lamp.
- Phillips screwdriver: Remove screws from socket and base
- Wire strippers: Trim and prepare cord ends
- Needle-nose pliers: Grip small parts and wires
- Insulated gloves: Safety when handling wiring
- X-Acto knife: Cut felt pad precisely
- Soft brush: Clean dust from crevices
Final Tips and Pro Advice
End with best practices for lasting results when taking apart a lamp.
Replace Old Parts
Upgrade outdated components. Use 8 ft, 18 AWG, polarized cord. Replace plugs with modern grounded ones if possible. Match socket to bulb type, typically E26 standard.
Paint or Refinish (Optional)
You can paint disassembled parts after cleaning. Use high-heat paint for sockets. Apply primer first for metal or ceramic. Let dry 24 hours before reassembly.
Document the Process
Take before, during, and after photos. They are invaluable for complex lamps or future repairs.
Final Word: Preserve original aesthetics, but prioritize safety. A beautifully restored lamp is not worth a fire risk.
Frequently Asked Questions About Taking Apart a Lamp
Can I take apart any type of lamp myself?
Yes, most table and floor lamps can be disassembled at home with basic tools. Chandeliers require additional caution because they are hardwired, so turn off the circuit breaker first. Always prioritize electrical safety when taking apart a lamp.
How do I know if my lamp needs rewiring?
Replace the cord if it shows fraying, cracking, or is over 20 years old. Also replace plugs that are over 40 years old because they do not meet current safety standards. If the lamp does not light or flickers after replacing the bulb, the wiring likely needs attention.
What tools do I need to take apart a lamp?
You will need a Phillips screwdriver, wire strippers, needle-nose pliers, insulated gloves, an X-Acto knife, and a soft brush. These basic tools cover most lamp disassembly tasks.
How do I reassemble the lamp correctly?
Work in reverse order of disassembly. Thread the cord through the base and rod, tie a lineman’s knot for strain relief, connect wires to the correct terminal screws, and reassemble the socket. Take photos during disassembly to guide reassembly.
Can I paint lamp parts after taking them apart?
Yes, clean parts thoroughly first. Use primer appropriate for the material, apply your chosen paint, and allow at least 24 hours drying time before reassembly. High-heat paint works best for sockets.
What is a lineman’s knot and why do I need one?
A lineman’s knot is a strain relief knot that prevents wire pull at the terminal connections. It involves wrapping the hot wire behind the cord and the neutral wire in front, then passing each through the opposite loop. This knot is essential for electrical safety when reassembling the lamp.
Key Takeaways for Taking Apart a Lamp
Taking apart a lamp requires patience, the right tools, and attention to safety. Always unplug the lamp or turn off the circuit breaker before starting. Document each step with photos because they are invaluable during reassembly. Replace old cords, plugs, and damaged components to meet modern safety standards. Use a lineman’s knot for strain relief to prevent wire connections from loosening over time. Test the lamp before finalizing assembly to ensure everything works properly. With careful disassembly and smart reassembly, your lamp can shine safely for years to come.



