
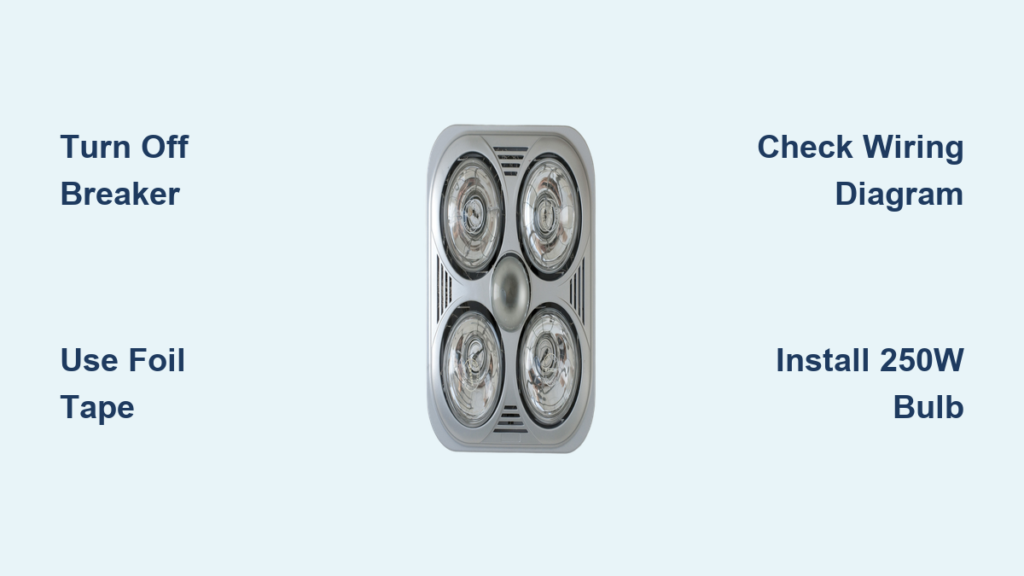
If your bathroom feels cold and damp during winter mornings, installing a bathroom heat lamp can transform your daily routine. Most modern units combine a heat lamp, ventilation fan, and light into one ceiling-mounted fixture, saving valuable space while eliminating chill and excess humidity. This guide walks you through how to install a bathroom heat lamp safely and effectively, even if you have basic DIY experience. You will learn how to remove an old vent fan, wire the new unit correctly, seal all ductwork, and test for quiet, efficient operation.
Remove Your Old Bathroom Vent Fan
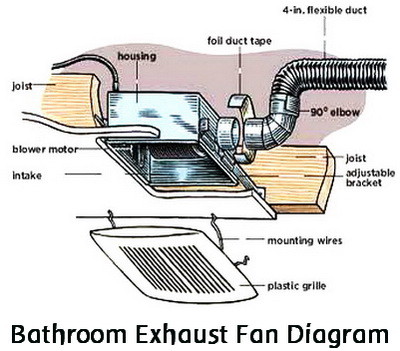
Before installing a new heat lamp unit, you must safely remove the existing vent fan. Most units are accessible from the attic, which makes removal straightforward and safer than working from below.
Access and Disconnect the Old Unit
Turn off the power at the circuit breaker before starting any work. Locate the existing fan in the ceiling and access it from the attic side. The old fan is typically held in place with four mounting screws driven into ceiling joists. Remove these screws carefully and lower the unit gently.
Disconnect the electrical wiring before fully removing the unit. The wires run through the ceiling opening and include black (hot), white (neutral), and bare copper (ground) wires. Pull them free once disconnected.
Inspect and Seal the Opening
Check the old fan for dust buildup in the blower wheel and signs of internal moisture. These issues commonly affect units that are 8-9 years old and often lead to noise or complete failure. Clean the area around the ceiling opening and seal it temporarily with insulation or plastic to prevent attic air, moisture, or debris from entering while the new unit is being installed.
Prepare the New Heat Lamp Unit for Installation
Most replacement units slide into the same ceiling cutout, making sizing straightforward. Verify that your new unit matches the old one in dimensions and electrical requirements before beginning the installation.
Verify Mounting Compatibility
New units typically use adjustable mounting brackets or side tabs that lock into slots. Loosen the brackets, position them flush with the ceiling surface, then tighten. This ensures a level, stable fit and reduces vibration during operation.
If the original screw holes do not align, use short decking screws with washers to secure the housing to the joists. This situation is common when upgrading between different models or when joist spacing varies slightly.
Connect Electrical Wiring Safely
All electrical work must be performed with the breaker turned off. Use a non-contact voltage tester to confirm no power is present before handling any wires.
Knock Out the Wiring Opening
Insert the electrical connector through the lower knockout hole on the fan housing. Use a screwdriver to break the metal tab inside the opening. Slide the connector through from below and secure it from the attic side with a locking-ring nut. Make sure screw heads face upward to match the original orientation, which ensures compatibility with wall switch controls.
Ground the Unit First
Attach the bare copper ground wire to the green grounding terminal on the unit. This critical safety step prevents electrical shock and must never be skipped.
Match Wires by Color and Function
Follow the manufacturer wiring diagram exactly for your specific model. The typical wiring configuration includes:
• Red and blue wires from the unit connect to the black (hot) wire from the supply
• White wire from the unit connects to the white (neutral) wire
• Cap each connection with a wire nut
Pro Tip: Twist wires together before capping to ensure a solid connection. After securing, gently tug each wire to confirm it will not pull loose. Loose connections can cause arcing, overheating, or fire.
Install the Ductwork Properly

Efficient ducting prevents moisture buildup in the attic and ensures strong airflow out of the bathroom. Proper installation also prevents condensation issues that can damage insulation and structural elements.
Attach the Flex Duct Adapter
Slide the flex duct adapter onto the fan exhaust outlet. Use foil tape, not duct tape, to seal the joint completely. Wrap the tape around the entire perimeter to create an airtight seal. Foil tape withstands high temperatures and does not degrade over time, unlike plastic-based tapes.
Extend the Duct to the Exterior
Connect a short rigid duct stub to the adapter, then attach flexible ducting to run to the roof or wall exhaust vent. Keep the run as straight as possible to maximize airflow. Support the duct every 4-5 feet with strapping to prevent sagging, which traps moisture and reduces efficiency.
Seal the Exterior Vent
At the roof or wall cap, seal the joint from underneath and wrap foil tape around the outside edge. This creates a weather-resistant, permanent seal that prevents water intrusion and backdrafts.
Install an Air Dam in Cold Climates
In colder climates, add an air dam, which is a rigid insulation panel, over the ceiling opening in the attic. Cut it to fit snugly around the duct and secure it in place. This blocks convective air movement, reduces heat loss, and prevents condensation in the attic space.
Mount the Heat Lamp Unit Securely
With wiring and ducting complete, it is time to secure the new unit to the ceiling. Proper mounting ensures quiet operation and prevents vibration issues.
Slide Into the Ceiling Opening
Position the unit over the opening. For vertical-mount models, angle one side first to engage the mounting tabs, then rotate the unit upward to lock it into place. Ensure the adjustable brackets are flush with the ceiling drywall and tighten all screws securely to prevent vibration and noise.
Confirm Position Before Finalizing
Double-check that the unit is level and centered. Misalignment can cause rattling or poor airflow. If needed, adjust the brackets slightly and re-tighten before proceeding.
Complete Final Assembly
Now that the unit is mounted, finish the internal setup before closing everything up.
Recheck All Wiring Connections
Before closing the cover, verify that the ground wire is secured, red and blue wires connect to black, white connects to white, and all wire nuts are tight. No exposed copper should be visible beyond the wire nuts.
Install the Grill and Heat Lamp Bulb
Attach the grill using the two small springs provided. Hook each spring eyelet over the tabs inside the housing. The grill should snap into place securely.
Install the heat lamp bulb, which is typically a 250W infrared bulb rated for high heat and moisture. Never exceed the wattage specified by the manufacturer.
Warning: Always use a bulb designed for heat lamps. Standard bulbs can overheat, shatter, and create a fire hazard.
Test the Unit Thoroughly
Restore power at the breaker and test each function carefully before considering the installation complete.
Run a Full Function Check
Turn on the fan and confirm it runs smoothly and quietly. Activate the heat lamp and verify the bulb illuminates fully within seconds. Test the light function if included and ensure it turns on independently if wired to a separate switch. Listen for unusual noises like grinding or rattling, which may indicate loose parts or misalignment.
Verify Airflow and Draft Blocker
Go outside and confirm strong airflow at the exhaust vent. A typical bathroom fan should move 75 CFM (cubic feet per minute), which is sufficient for most small to medium bathrooms. Check the draft blocker if equipped. It should open when the fan runs and close automatically when off to prevent cold air backflowing into the bathroom and reduce energy loss.
Prevent Condensation and Improve Efficiency
Even a well-installed unit can cause problems if insulation and sealing are overlooked. Taking these extra steps ensures long-term performance.
Insulate Around the Unit Properly
In the attic, insulate around but not over the housing. Covering the fan can trap heat and create a fire hazard. Use fire-rated insulation shields if required by local building codes.
Seal All Gaps Completely
Check for gaps between the duct and adapter, the exterior vent, and the ceiling opening. Reapply foil tape where needed. Even small leaks reduce efficiency and invite moisture into the attic space.
Safety Tips and Common Mistakes
Avoid these frequent errors to ensure a safe, lasting installation that performs well for years.
Never Skip the Breaker Shut-Off
Working on live wires risks serious injury or death. Always turn off the circuit and verify it is dead before touching any wires.
Do Not Use Duct Tape on Ducts
Duct tape dries out, cracks, and fails in high-moisture environments. Foil tape is the only acceptable sealant for bathroom vent ducts.
Avoid Over-Tightening Wire Nuts
This can strip wires or break strands, leading to poor connections. Hand-tighten only, then tug-test for security.
Use the Correct Heat Lamp Bulb
Infrared heat lamp bulbs are designed to withstand thermal stress. Using the wrong bulb risks melting, cracking, or fire.
Clean the Grill Regularly
Dust and moisture reduce airflow and efficiency. Wipe the grill monthly and inspect the fan housing annually.
When to Call a Professional
While this project is DIY-friendly for those with basic skills, some situations require expert help. Call a licensed electrician or HVAC technician if the wiring does not match the new unit requirements, if the ceiling opening is too large or damaged, if there is no attic access making installation from below too complex, or if you are unsure about grounding or circuit load capacity.
Frequently Asked Questions About Installing a Bathroom Heat Lamp
Can I install a bathroom heat lamp myself?
Yes, if you have basic electrical and carpentry skills. The project involves removing an old vent fan, connecting wires, installing ductwork, and testing. However, always turn off the circuit breaker and follow the manufacturer wiring diagram exactly.
What size heat lamp do I need for a bathroom?
Most bathroom heat lamps use a 250W infrared bulb. This wattage provides sufficient heat for small to medium bathrooms. Always check your manufacturer specifications and never exceed the recommended wattage.
Why is foil tape better than duct tape for bathroom vents?
Foil tape withstands high temperatures and moisture without degrading. Duct tape dries out, cracks, and fails in humid bathroom environments, leading to air leaks and condensation problems.
How do I know if my heat lamp is working properly?
The fan should run smoothly and quietly. The heat lamp bulb should illuminate fully within seconds. You should feel warm air flowing from the vent. If you hear grinding or rattling, check that all mounting screws are tight.
Do I need an air dam for my bathroom heat lamp?
Air dams are recommended in cold climates like Michigan. They block convective air movement in the attic, reduce heat loss, and prevent condensation buildup around the ductwork.
Key Takeaways for Installing Your Bathroom Heat Lamp
Installing a bathroom heat lamp improves comfort, reduces humidity, and prevents mold growth, especially in cold climates. Focus on three critical areas for success. First, ensure secure wiring by turning off the breaker, following the wiring diagram exactly, and testing each connection with a tug test. Second, create airtight ducting by using foil tape on all joints, supporting the duct every 4-5 feet, and sealing the exterior vent properly. Third, select the correct bulb by using only heat lamp bulbs rated for high temperatures, typically 250W infrared models.
With the right tools and precautions, your new heat lamp will deliver warm, dry air for years to come. Take time to test all functions before closing up the installation, and add regular maintenance like cleaning the grill monthly to extend the unit lifespan.



