Is your projector displaying a dim, flickering image or flashing a “Replace Lamp” warning? You are not alone. Projector bulbs wear out over time, and replacing one is a simple maintenance task that most users can complete in under 15 minutes. Whether you use an Epson, BenQ, Sony, or Optoma, this guide walks you through every step from identifying when to replace the bulb to resetting the lamp timer and avoiding costly mistakes.
Identify a Failing Projector Bulb
Before opening your projector, confirm the bulb is actually the issue. Symptoms of a dying lamp go beyond just dimming.
Dim or Flickering Image
If your projected image looks washed out or pulses in brightness, the bulb may be near end-of-life. This often happens even at maximum brightness settings. In some cases, the flickering syncs with the fan cycle, indicating unstable power delivery to a failing arc tube.
Color Shifts and Black Spots
A yellow, red, or orange tint across the screen suggests uneven phosphor decay in the bulb. Similarly, visible black spots or shadows mean part of the bulb surface has burned out. These are irreversible signs that replacement is required.
Lamp Warning and Unexpected Shutdowns
Most projectors display an on-screen “Replace Lamp” message or flash a warning light when usage exceeds the rated lifespan. Some models even limit brightness output automatically. If your projector shuts down unexpectedly during use, it could be due to overheating triggered by a failing bulb or aging ballast.
Pro Tip: Check your projector lamp hour counter in the settings menu. If it is near 1,500 to 2,000 hours or 5,000 in Eco mode, plan for replacement soon.
Confirm Your Lamp Type and Compatibility

Not all projector bulbs are interchangeable. Installing the wrong type can damage your unit or void the warranty.
Module vs. Bare Bulb: Know the Difference
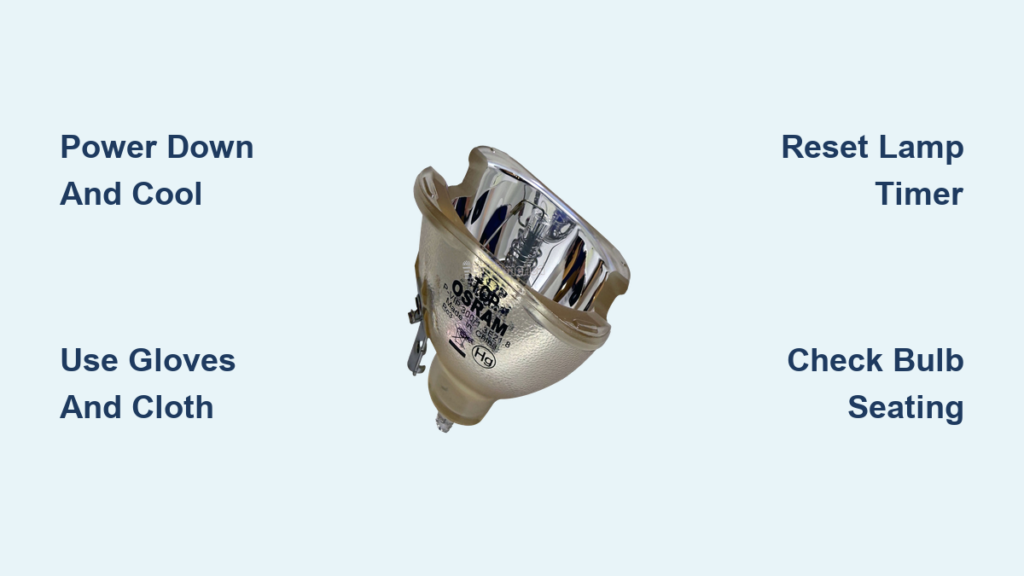
Most modern projectors use a lamp module, a pre-assembled unit with the bulb mounted inside a plastic or metal housing. These are safer and easier to install, requiring only screw removal and a pull-up motion using the built-in handle.
In contrast, bare bulbs contain just the glass component. You must manually insert it into the socket and reconnect internal wires. This process is riskier and typically found in older or high-end models.
Critical: Always verify your model requirement. Check the user manual, manufacturer website, or use tools like MyProjectorLamps.com to find your exact part number.
Avoid Generic or Uncertified Bulbs
While OEM bulbs cost more, they ensure compatibility, brightness accuracy, and safety. Certified third-party replacements offer savings without sacrificing reliability. Steer clear of uncertified generics. They often fail early, trigger error messages, or underperform.
Prepare for Safe Replacement
Safety comes first. A hot projector or mishandled bulb can lead to burns or premature failure.
Power Down and Cool Off
Turn off the projector using the remote or front panel, then unplug the power cord. Never skip unplugging. Some internal circuits remain live even when powered down.
Wait at least 60 minutes after shutdown. The lamp housing can exceed 200°C during operation. Even if the outer case feels cool, internal components stay dangerously hot.
Gather Tools and Supplies
You will need the correct replacement lamp module or bare bulb, a #2 Phillips screwdriver, clean microfiber cloth, disposable nitrile gloves, and a flat padded work surface.
Keep screws organized in a small tray to avoid losing them. If your model uses retained screws that stay attached to the cover, do not force them out.
Warning: Never touch the glass surface of a new bulb. Skin oils create hot spots that can cause cracking or explosion when heated.
Locate and Access the Lamp Compartment
Accessing the lamp is straightforward on most models.
Find the Lamp Cover
Look for a panel labeled with a lamp icon, “Bulb,” or “Lamp.” It is usually on the bottom, side, or rear of the projector. Use your screwdriver to remove one or two screws securing the cover.
Slide or lift the cover off carefully. Some designs require a slight upward pull after loosening.
Pro Tip: If ceiling-mounted, you can usually replace the lamp without removing the projector. Just ensure safe ladder access and allow full cooling.
Remove the Old Lamp Safely
Handling the old unit properly prevents injury and contamination.
Extract a Lamp Module
For modular systems found in Epson, BenQ, and Panasonic projectors, locate the two retaining screws on the module. Loosen them. Note they may be retained and stay attached.
Grasp the crescent-shaped handle or two-finger grip. Pull the entire unit straight up to disconnect it from the socket. Never yank or tilt. A smooth vertical motion prevents damage to the connector.
Remove a Bare Bulb
For bare bulb models, remove the retaining clip or bracket. Carefully disconnect the wires from the terminals. Lift the bulb straight out without twisting or tilting.
Place it immediately in a sealed container, especially if cracked.
Caution: If the bulb is broken, wear gloves and avoid inhaling particles. Some lamps contain mercury vapor and require special disposal.
Install the New Lamp Correctly

Improper installation is the top cause of post-replacement issues.
Insert a Lamp Module
Take the new module and align it with the socket. Ensure the electrical connector at the base matches the projector receptacle.
Lower it straight down and push firmly until it clicks or seats fully. Do not force it. Once seated, reinstall and tighten the two retaining screws evenly. Avoid over-tightening, which can strip the plastic housing.
Install a Bare Bulb
Wearing gloves or using a microfiber cloth, hold the new bulb by its base or casing only. Align it with the socket by matching notches or pins. Insert it straight in without tilting.
Reconnect the wires securely to the terminals. Reattach the retaining clip or bracket.
Critical: Never touch the glass. Even a fingerprint can cause early failure.
Reassemble and Seal the Compartment
A poorly sealed lamp cover can prevent the projector from turning on.
Replace the Lamp Cover
Slide or press the cover back into place, ensuring it is flush with the housing. Misalignment can trigger safety interlocks.
Reinsert and tighten the cover screws securely. Double-check that no gaps remain.
Visual Cue: The cover should sit flat and even with the projector body. If it sticks out or wobbles, realign before proceeding.
Reset the Lamp Hour Counter

This step is mandatory. Skip it, and your projector may continue showing warnings or limit brightness.
Access the Reset Menu
Power on the projector. Use the remote or onboard buttons to navigate to Settings, System Menu, or Maintenance. Look for Lamp Settings or Reset Options.
Look for Reset Lamp Hours, Initialize Lamp Timer, or similar. Confirm the reset. Wait for a success message like “Lamp Timer Reset.”
Follow Brand-Specific Paths
| Brand | Menu Path |
|---|---|
| Epson | Menu → Setup → Reset → Reset Lamp Hours |
| Sony | Options → Setup → Maintenance → Reset Lamp Timer |
| BenQ | System Setup → Maintenance → Reset Lamp Hours |
| Optoma | Menu → System → Reset → Reset Lamp Timer |
| Panasonic | Menu → Setup → Reset → Lamp Reset |
| ViewSonic | Menu → Setup → Maintenance → Reset Lamp Hours |
Note: Exact paths vary by model. Consult your manual or manufacturer support site if unsure.
Test the Projector Fully
Verify everything works before calling it done.
Power On and Warm Up
Plug in and turn on the projector. Allow 10 to 30 seconds for the bulb to warm up and reach full brightness.
Display a solid white screen, video, or test pattern.
Check for Issues
Look for full even brightness, accurate colors with no yellow or red tint, no flickering shadows or black spots, and absence of error messages or warning lights.
If problems persist, power off and recheck bulb seating. Confirm all screws are tightened. Ensure the lamp cover is properly installed. Re-verify the lamp timer was reset.
Pro Tip: Clean or replace the air filter during this maintenance window. A clogged filter causes overheating and shortens bulb life.
Troubleshoot Common Post-Replacement Issues
Even with careful installation, problems can arise.
Projector Will Not Turn On
Likely causes include lamp not fully seated, cover improperly installed, or safety interlock not engaged.
Fix: Reopen the compartment and ensure the module is pushed down completely. Confirm the cover is flush and screws are tight.
Replace Lamp Warning Still Shows
This almost always means the lamp hour counter was not reset.
Fix: Navigate to the reset menu and follow the steps. If the option is grayed out, power cycle the projector and try again.
Dim or Flickering Output
This could indicate poor electrical connection, defective bulb, or loose wires in bare bulb models.
Fix: Reinstall the lamp. If the issue continues, test with a known-good module.
Overheating or Buzzing Noise
A clogged air filter is the usual culprit. A buzzing sound may point to a loose component or failing ballast.
Fix: Clean the filter and ensure vents are unobstructed. If noise persists, contact a technician.
Extend Bulb Life with Smart Maintenance
Maximize your investment with simple care habits.
Use Eco Mode When Possible
Switching to Eco mode reduces brightness slightly but can extend bulb life by up to 50 percent. Ideal for well-lit rooms or shorter viewing sessions.
Clean Filters Every 100 to 200 Hours
Dust buildup restricts airflow and causes overheating. Clean or replace the air filter during each lamp change.
Avoid Frequent Power Cycles
Each on/off cycle stresses the bulb. For short breaks, leave the projector running instead of turning it off.
Allow Cool-Down Time
Let the projector run its fan for 3 to 5 minutes after use before unplugging. This prevents thermal shock to internal components.
Use a Surge Protector
Voltage spikes can damage the bulb, ballast, or power supply. A quality surge protector safeguards your system.
Pro Tip: Store spare bulbs in their original packaging in a dry temperature-controlled space.
When to Consider LED or Laser Projectors
Bulb-based projectors are still viable, but newer technologies offer long-term benefits.
Bulb vs. LED vs. Laser Comparison
| Feature | Bulb | LED | Laser |
|---|---|---|---|
| Lifespan | 1,500 to 5,000 hrs | 20,000+ hrs | 20,000+ hrs |
| Replacement Needed | Yes | No | No |
| Brightness Over Time | Degrades | Stable | Stable |
| Warm-Up Time | 30 to 60 sec | Instant | Instant |
| Best For | Budget users, occasional use | Portable, long-term | High-use environments |
While bulb models cost less upfront, LED and laser projectors eliminate recurring lamp costs and downtime. These are ideal for schools, businesses, or home theaters used daily.
Final Note: For mission-critical or frequent use, upgrading to laser may save money and hassle over time.
Frequently Asked Questions About Changing a Projector Lamp Bulb
How long do projector bulbs typically last?
Standard bulbs last 1,500 to 2,000 hours under normal use. In Eco mode or high-end models, lifespan can extend to 5,000 hours or more.
Can I replace the bulb while the projector is ceiling-mounted?
Yes. Most projectors allow lamp replacement without removal from the mount, provided safe ladder access is available and the unit has fully cooled.
What should I do with the old bulb?
Do not throw it in regular trash if it contains mercury. Recycle through e-waste facilities, manufacturer take-back programs, or hazardous material drop-offs.
Why is resetting the lamp hour counter mandatory?
Failing to reset the counter causes the projector to continue showing warnings or limit brightness output, even with a new bulb installed.
Are projector bulbs universal?
No. Each projector model requires a specific bulb with a unique part number. Always verify compatibility before purchase.
Can I use a generic bulb to save money?
Generic or uncertified bulbs often fail early, trigger error messages, or underperform. OEM or certified third-party bulbs ensure compatibility and reliability.
Key Takeaways for Changing Your Projector Lamp Bulb
Changing a projector lamp bulb is a quick, user-friendly task when done safely and correctly. By following these steps, cooling the unit, using gloves, installing the right module, and resetting the timer, you will restore full performance in minutes.
Pair the replacement with air filter maintenance and Eco mode usage to extend the next bulb life. Allow proper cool-down time, avoid frequent power cycles, and use a surge protector to maximize your investment.
If you rely on your projector daily, keep a spare lamp module on hand to avoid unexpected downtime. With proper care, your projector will deliver sharp, vibrant images for years to come.