
You’ve found the perfect vintage lamp base, but the socket is cracked or the wiring is shot. Or maybe you’re building a custom floor lamp from scratch. Either way, wiring a lamp socket is a simple yet critical DIY skill that ensures your fixture works safely and reliably. Done correctly, it takes less than 20 minutes with basic tools. Done wrong, it can lead to shock, fire, or flickering lights.
This guide walks you through every step, from identifying hot and neutral wires to securing connections and testing your work. Whether you’re replacing a damaged socket or assembling a new lamp, you’ll learn how to wire a lamp socket with correct polarity, secure strain relief, and professional results.
Identify Socket Components
Before touching any wires, understand what you’re working with. A standard lamp socket isn’t just a bulb holder. It is a precision electrical connector with specific parts that must be wired correctly for safety.
Key Parts of a Lamp Socket
The brass terminal screw connects to the hot wire and powers the center contact. The silver terminal screw connects to the neutral wire and powers the threaded shell. The green ground screw, found only on grounded models, attaches to bare copper or green wire. The center contact is the small metal disc at the bottom where the bulb base makes contact. The threaded shell is where the bulb screws in, and it connects to neutral for safety. The cord grip or barrel clamp secures the power cord to prevent pull on the terminals. The insulator is a plastic or cardboard spacer that prevents short circuits between contacts.
Pro Tip: Porcelain sockets handle heat better than plastic and are ideal for high-wattage bulbs.
Gather Essential Tools
You do not need a full electrician’s toolkit. Just a few basics will get the job done right.
Must-Have Tools
A screwdriver, either flathead or Phillips, depending on your socket terminals. A wire stripper or scissors for light stripping work. Needle-nose pliers for bending loops and twisting wires. Scissors for cutting tape or cloth cords.
Recommended for Safety
A non-contact voltage tester confirms no live current before work begins. A multimeter verifies polarity and continuity. Electrical tape marks wires during disassembly to ensure correct reconnection.
Note: Always use UL-listed or ETL-certified sockets and cords. Never use makeshift or damaged parts.
Disconnect Power and Remove Old Socket
Safety comes first before loosening any screw.
Steps to Begin Safely
Unplug the lamp and never work on a live circuit. Remove the lampshade and bulb for clear access to the socket. Place the lamp on the floor to avoid tipping. Work in a dry, well-lit area with clean hands.
Removing the Old Socket
Unscrew the socket shell, the outer threaded cap. Look for a release tab inside the base and press it to slide the socket out. Mark the hot wire with electrical tape before disconnecting to ensure correct reconnection. Loosen terminal screws and remove the wires.
Warning: If the cord or socket shows discoloration, melting, or fraying, replace both components entirely.
Identify Hot and Neutral Wires
:max_bytes(150000):strip_icc()/electrical-wire-color-coding-1152863-1885f3461ba9443f8bcf14a1f9236a2d.png)
Correct polarity prevents shock, even when the lamp is turned off. Getting this wrong is dangerous.
Standard Wiring Colors in the US
Black wire connects to hot and goes to the brass screw. White wire connects to neutral and goes to the silver screw. Green or bare wire connects to ground and goes to the green screw if present.
When Wires Look Identical
Some cords have two black wires or clear insulation with no color coding. In these cases, smooth insulation indicates the hot wire. Ribbed or textured insulation indicates the neutral wire. The narrower blade on the plug connects to hot, and the wider blade connects to neutral.
Critical Risk: Reversed polarity energizes the bulb socket shell. You can get shocked just by changing a bulb with the lamp turned off.
Strip and Prepare the Wires
Clean, precise wire preparation ensures solid connections that last.
Step-by-Step Wire Stripping
Cut the cord to your desired length, typically 6 feet for table lamps. Separate the two conductors by about 4 inches. Strip one-half inch of insulation from each end. Use 1 inch if forming an electrician’s knot. For stranded wire, twist the strands clockwise with pliers to prevent fraying.
Pro Tip: Wrap 1 inch of tape around the cord end before stripping to stop fraying.
Create an Electrician’s Knot for Strain Relief
This simple knot prevents cord tension from pulling wires loose over time.
How to Tie the Electrician’s Knot
Hold the stripped wires in a Y-shape. Loop one wire behind the center point. Loop the other wire in front of the center point. Pass each end through the opposite loop. Pull tight to form a compact, interlocked knot.
Why It Matters: Without strain relief, tugging the cord loosens terminal connections, leading to arcing or complete failure.
Connect Wires to Terminal Screws
This is where safety and function meet. Every detail matters here.
Correct Terminal Wiring
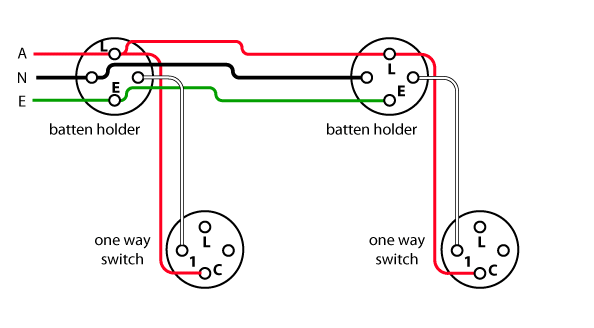
Hot wire, whether black or smooth insulation, connects to the brass screw. Neutral wire, whether white or ribbed insulation, connects to the silver screw. Ground wire, green or bare copper, connects to the green screw if your socket has one.
How to Make a Secure Connection
Use needle-nose pliers to form a clockwise loop, a C-shape, on each wire end. Hook the loop under the screw head so tightening pulls the wire tighter, not looser. Tighten the screw firmly with no exposed copper extending past the screw head. Perform a yank test by gently pulling each wire to confirm it will not slip.
Common Mistake: Counterclockwise loops loosen when the screw is tightened. Always loop clockwise.
Reassemble the Socket
Now secure the housing and strain relief mechanism.
Step 1: Secure the Socket Cap
Tuck the connected wires into the base carefully. Align the socket shell and twist it clockwise until snug. Use pliers to tighten, but do not crack porcelain.
Step 2: Install Cord Grip
Slide the cord grip down the wire. Insert it into the base or cap. Screw it in fully. Attach the cap if it is separate.
Function: The cord grip absorbs tension. Never let the terminals bear cord stress.
Step 3: Reattach the Switch
Align the switch frame and press until it clicks. Tighten any mounting screws if needed.
Test the Lamp Safely
Never skip verification. This step confirms your work is correct.
Final Testing Steps
Plug in the lamp. Insert a working bulb, such as a 60W LED. Turn the switch on.
Expected Result
The light turns on immediately and steadily with no flickering.
Use a Tester to Confirm Safety
With a non-contact voltage tester, it should beep at the center contact, which is hot. It should not beep at the threaded shell, which is neutral. With a multimeter, hot to neutral reads approximately 120V. Hot to ground reads approximately 120V. Neutral to ground reads approximately 0V.
Warning Signs: Flickering indicates a loose connection. No light means reversed polarity or a bad switch. Warmth or a burning smell indicates an overloaded bulb or poor contact. Unplug immediately and recheck all connections if any issues occur.
Handle Special Configurations
Some lamps require extra wiring steps beyond standard single-bulb setups.
How to Wire a 3-Way Socket
A 3-way socket requires a 3-way bulb, a 3-way switch, and a 3-conductor cord with black, red, and white wires. The common terminal connects to the black hot wire. The two side terminals connect to the red and white wires for medium and high settings. You must use a 3-way compatible switch and plug.
Wiring Multiple Bulbs
Use parallel wiring for multiple bulbs. All hot wires join together. All neutral wires join together. Use wire nuts or terminal blocks for secure connections. Ensure total wattage stays within cord rating, typically 16 AWG handles up to 10A.
Installing a Dimmer Switch
Break the hot wire and connect to dimmer input and output. Use LED-compatible dimmers if using LED bulbs. Do not install on grounded circuits unless specifically rated for it.
Push-In Socket Terminals
Some sockets accept three-sixteenths inch stripped wires in labeled holes. Simply insert the wire into the L or N hole and tug to confirm hold. No screws required. This is faster but less adjustable than screw terminals.
Troubleshoot Common Problems
Fix issues before they become hazards.
Lamp won’t turn on: Cause is a loose wire, bad switch, or dead bulb. Fix by checking terminals, testing the switch, and trying a new bulb.
Flickering light: Cause is poor contact at the socket or switch. Fix by tightening connections and replacing the switch if needed.
Shock when touching: Cause is reversed polarity or exposed wire. Fix by testing polarity and inspecting insulation.
Burning smell: Cause is an overloaded bulb or loose wire. Fix by using a lower wattage bulb and rewiring if needed.
Sparking at plug: Cause is a damaged cord or plug. Fix by replacing the cord assembly.
When in doubt, consult a licensed electrician.
Maintain Long-Term Safety
Prevent future issues with simple care and regular inspection.
Durability Tips
Inspect cords annually for cracks or brittleness. Replace discolored sockets, as this signals overheating. Use the correct bulb wattage and never exceed the socket rating. Clean contacts occasionally with electrical contact cleaner. Store lamps in dry environments to prevent moisture damage. Avoid tight cord coiling, which can damage internal wires over time.
Pro Advice: Keep spare sockets and cords on hand for quick repairs.
Avoid Critical Wiring Mistakes
Even small errors can be dangerous. Learn what to avoid.
Top 5 Wiring Mistakes
Reversing hot and neutral creates a shock risk. Skipping strain relief causes wire pull-out. Leaving terminal screws loose causes arcing and heat. Nicking copper strands creates hot spots. Over-tightening porcelain cracks the component.
Golden Rule: Always perform a yank test and polarity check after installation.
Final Verification Checklist
Before plugging in, run through this list.
Lamp unplugged. Old socket removed safely. Hot and neutral wires identified correctly. Wires stripped to one-half to 1 inch. Strands twisted clockwise. Electrician’s knot or cord grip installed. Hot goes to brass, neutral goes to silver. Loops clockwise under screws. Screws tightened and yank test passed. Wires tucked and shell secured. Cord grip tightened. Switch reassembled. Lamp tested and working. Polarity verified with tester.
Key Takeaways for Wiring a Lamp Socket
Wiring a lamp socket is more than a repair. It is a chance to build something safe, functional, and lasting. The three pillars of success are correct polarity, secure connections, and proper strain relief. Always connect hot to brass, neutral to silver, and protect your connections with a knot or cord grip. With the right tools, attention to detail, and a few minutes of careful work, you can restore or create a lamp that performs flawlessly for years.
Now you are ready to wire with confidence.
Frequently Asked Questions About Wiring a Lamp Socket
Does it matter which wire connects to which screw?
Yes, it matters greatly. Correct polarity is critical for safety. The hot wire connects to the brass screw, which powers the center contact. The neutral wire connects to the silver screw, which powers the threaded shell. This ensures the switch interrupts the hot side and reduces shock risk during bulb changes.
What happens if you wire a socket wrong?
Incorrect wiring can cause electric shock during bulb changes, short circuits, fire hazard, tripped breakers, and damage to bulbs or electronics. Reversed polarity is particularly dangerous because the socket shell becomes energized even when the lamp is turned off.
Can I wire a lamp without a ground wire?
Yes, most standard lamps use two-wire ungrounded cords and are double-insulated. Grounding is typically required only for metal fixtures or by local electrical code. Ungrounded lamps are safe when properly wired with correct polarity.
How do I know which side of the cord is neutral?
Look at the cord texture. Ribbed or textured surface indicates neutral. Smooth surface indicates hot. Some cords have writing or ridges on the neutral side. You can also check the plug. The wider blade connects to neutral, and the narrower blade connects to hot.
What is the electrician’s knot and why do I need it?
The electrician’s knot is a strain-relief knot that prevents cord tension from pulling wires loose from the terminals. It acts as a mechanical stop inside the socket housing. Without it, tugging or moving the cord over time loosens connections, causing flickering or complete failure.
Can I use any bulb wattage in my lamp?
No, always use bulbs within the manufacturer’s recommended wattage. Exceeding the rating causes overheating, which can melt the socket, damage wiring, or create a fire hazard. Check the socket rating label before purchasing bulbs.



