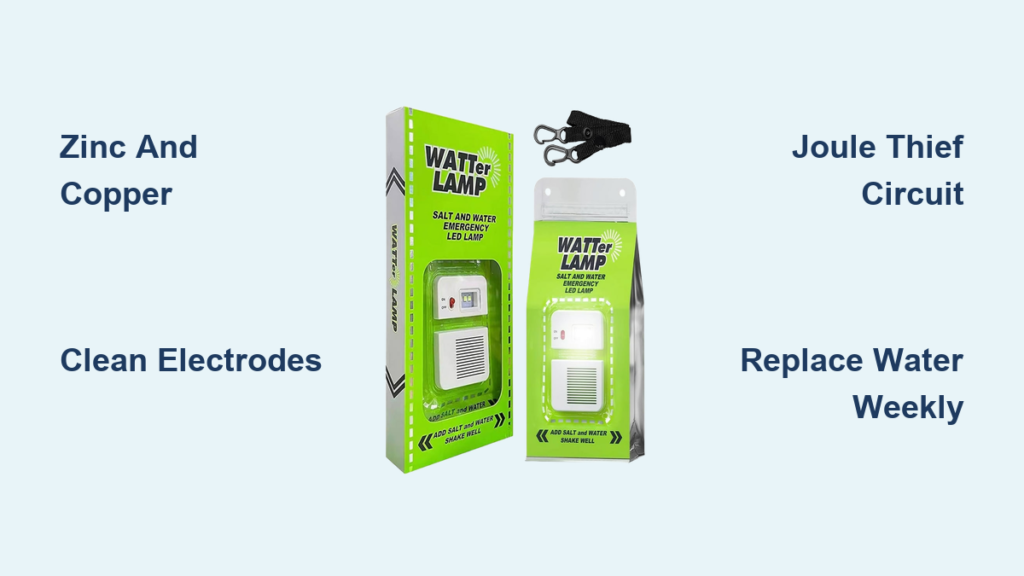
Imagine lighting your home with just salt, water, and metal with no electricity, no fire, and no fumes. A salt water lamp turns this into reality, offering a safe, sustainable, and low-cost lighting solution powered by basic chemistry. Originally developed in the Philippines to replace dangerous kerosene lamps, this simple device uses a galvanic cell to generate electricity and power an LED.
You do not need advanced tools or expertise to build one. With common household materials, you can create a functional lamp in under 30 minutes. This guide walks you through every step to make a salt water lamp that actually works. You will learn the best electrode combinations, how to boost dim light, and how to extend runtime.
Gather Materials for Your Salt Water Lamp
You only need a few inexpensive, easy-to-find parts to build a working salt water lamp. Having everything ready before you start makes the process smoother and faster.
You will need these components:
- Zinc electrode (anode): galvanized nail, zinc strip, or roofing metal
- Copper electrode (cathode): copper wire, pipe, or sheet
- Clear glass or plastic container (250-500 mL)
- Table salt (NaCl): 2 tablespoons
- Water: tap, filtered, or seawater
- LED: low-voltage (1.8-3.3V), red or white
- Wires with alligator clips
- Sandpaper or vinegar (for cleaning metal)
- Plastic lid (optional): to hold electrodes in place
Pro Tip: Use thick copper wire (12-14 gauge) and a large zinc sheet for better current. Avoid aluminum because it forms a blocking oxide layer that stops electron flow.
Prepare the Electrodes Properly

Electrode surface quality directly affects how much power your lamp produces. Taking time to clean the metals properly pays off in brighter light and longer runtime.
Follow these steps to prepare your electrodes:
- Cut zinc and copper pieces to 10-15 cm in length.
- Scrub both metals with sandpaper or soak in vinegar for 1 minute to remove rust, grease, or oxidation.
- Rinse and dry thoroughly before use.
- Insert into a plastic lid with holes, or suspend from the container rim. Ensure the electrodes do not touch each other.
Warning: If electrodes touch inside the saltwater, the circuit short circuits and no power reaches the LED.
Mix the Saltwater Electrolyte
The saltwater solution acts as the battery is engine. Getting the concentration right ensures maximum conductivity and power output.
Follow these steps to create the electrolyte:
- Pour 250 mL of water into your container.
- Add 2 tablespoons of salt and stir until fully dissolved.
- For better conductivity, add 2-3 drops of lemon juice or vinegar, especially if using aluminum electrodes.
Note: Seawater works perfectly without any extra salt. A saturated salt solution (about 26%) delivers peak performance, though standard concentration works well for most DIY builds.
Connect the LED Circuit Correctly
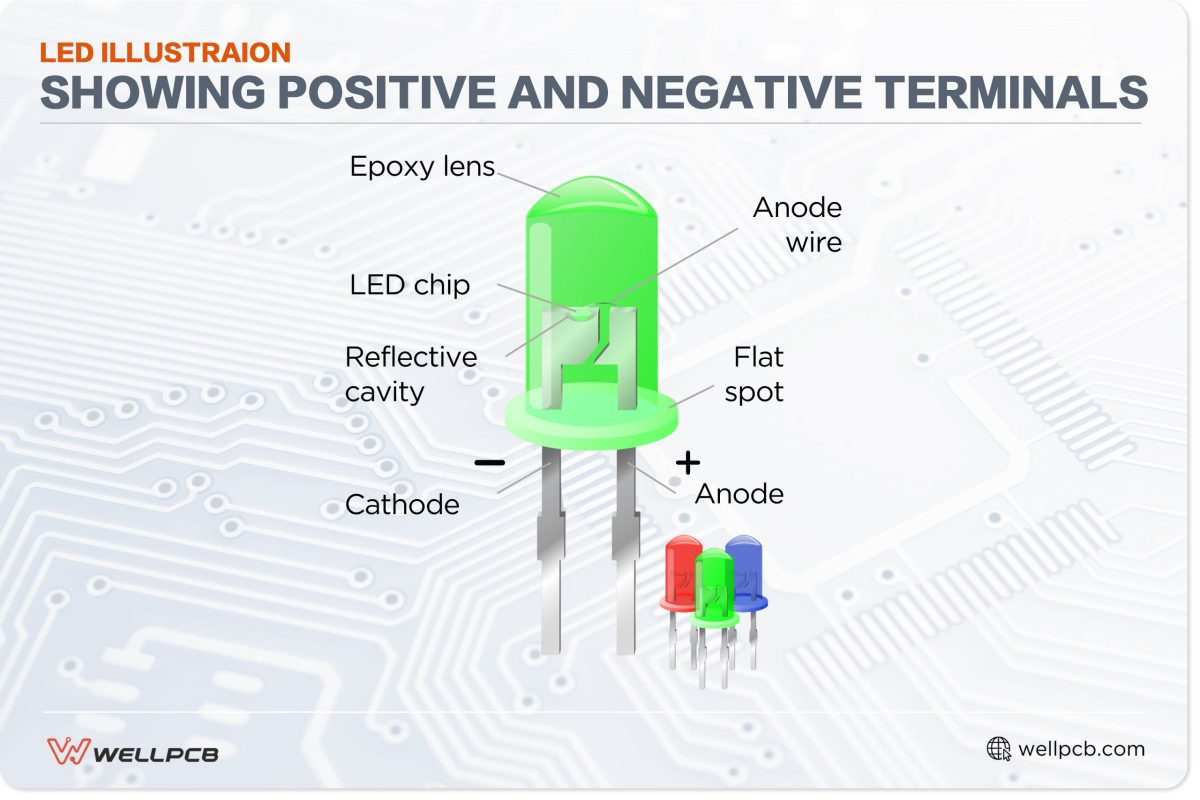
Wiring must match electrode polarity exactly. Getting this wrong is the most common reason DIY salt water lamps fail to light.
Follow these connection steps:
- Attach the LED is negative wire (the short leg) to the zinc electrode.
- Attach the LED is positive wire (the long leg) to the copper electrode.
- Submerge both electrodes fully in the saltwater. Do not let them touch.
Troubleshooting: If the LED does not light, reverse the wires. LEDs only work in one direction and will not light if polarity is reversed.
Test and Optimize Brightness
Initial glow may be dim. Several factors affect output, and small adjustments can significantly improve performance.
Check these common issues:
- Check voltage: Use a multimeter. A zinc-copper cell should read 0.8-1.2V.
- Boost dim light: Add a Joule Thief circuit to amplify low voltage and light standard LEDs.
- Increase power: Use larger electrodes or coil copper wire to increase surface area.
- Extend runtime: Place electrodes 2-3 cm apart. Closer reduces resistance but increases short risk.
User Hack: Some users report brighter light using magnesium instead of zinc (1.5-2.0V), but magnesium corrodes much faster and requires more frequent replacement.
Choose the Best Electrode Pair

Not all metal combinations work equally. Picking the right pair ensures reliable output and longer runtime.
Zinc and Copper: The Reliable Choice
This combination delivers 0.8-1.2V with zinc lasting 100+ hours. The reaction is stable and uses widely available materials.
The electrochemical reaction works as follows:
- Anode (zinc): Zn → Zn²⁺ + 2e⁻
- Cathode (copper): O₂ + 2H₂O + 4e⁻ → 4OH⁻
This is the go-to combination for beginners and real-world applications like the Philippine Salt Lamp.
Magnesium and Copper: Higher Voltage
Magnesium and copper produce 1.5-2.0V, which can power an LED without a booster circuit. The tradeoff is that magnesium corrodes quickly and must be replaced every few days.
This combination works best for short-term emergency use when you need immediate light and do not mind frequent electrode changes.
Avoid Aluminum and Copper
Aluminum and copper theoretically produce 0.5-1.0V, but aluminum oxide layer blocks electron flow. Performance drops fast even with surface scratching or acid treatment.
Expert Note: Despite being inexpensive and common, aluminum is unreliable for salt water lamps unless specially treated.
Iron and Copper: Last Resort Only
Iron and copper produce just 0.5-0.7V, which is usually too weak to light an LED without a Joule Thief. Only use this combination when other metals are unavailable.
Fix Common Problems Fast
Even small errors can stop your lamp from working. Here is how to diagnose and fix the most frequent issues.
LED Will Not Light
Check these potential causes in order:
- Voltage too low: Add a Joule Thief circuit
- Polarity reversed: Swap wires on electrodes
- Electrodes touching: Adjust spacing
- Oxidized metal: Clean with sandpaper
- Weak electrolyte: Add more salt or acid
Quick Test: Use a multimeter. If you read less than 0.8V, try magnesium electrodes or connect multiple cells in series.
Light Fades Quickly
This usually means depleted zinc or contaminated saltwater. Replace the water every 7-10 days. Use a larger zinc electrode to extend life.
Sign of Wear: White crust (zinc hydroxide) forms on zinc when it is wearing out. Clean or replace the electrode when you see this buildup.
Bubbles or Gas Forming
Tiny hydrogen bubbles may form at the cathode, especially in acidic solutions. This is normal at this scale and not dangerous.
Reduce bubbles by: Using neutral saltwater instead of vinegar or lemon juice.
Boost Performance Like a Pro
Turn a dim glow into usable light with these smart upgrades.
Use a Joule Thief Circuit
This tiny voltage booster lets LEDs light at just 0.3V, making weak cells effective.
- Buy or build a Joule Thief module from scrap electronics
- Connect between the salt water cell and LED following a circuit diagram
- Result: Even a single zinc-copper cell can power a bright LED
DIY Option: A transistor, resistor, toroid, and a few wires can make one for under $2.
Connect Multiple Cells in Series
Need 3V for a white LED? Stack cells together.
- Build 2-3 identical saltwater cells
- Link copper of Cell 1 to zinc of Cell 2
- Connect free zinc to LED negative, free copper to LED positive
Output: Two cells produce about 2.0V, three cells produce about 3.0V, which is enough for most LEDs.
Maximize Electrode Efficiency
Increase surface area by using coiled copper wire or a wide zinc sheet. Keep electrodes 2-3 cm apart for optimal current without shorting. Stir water occasionally to improve oxygen supply to the cathode.
Pro Tip: Larger containers allow bigger electrodes and longer runtime.
Maintain and Extend Lamp Life
A well-maintained salt water lamp can last months with minimal upkeep.
Replace Saltwater Regularly
Every 7-10 days, pour out the old solution and refill with fresh saltwater. Zinc ion buildup reduces ion flow and efficiency over time.
Disposal: Saltwater is safe to pour down the drain or into soil.
Sign it is time: Diminished brightness or slow start-up indicates the electrolyte needs replacing.
Monitor Electrode Wear
Replace zinc when it becomes thin, pitted, or covered in white residue. Copper lasts for years but clean it with vinegar if it becomes tarnished. Remove electrodes when not in use to slow corrosion.
Upgrade Idea: Use replaceable electrode rods for long-term convenience.
Store Properly When Idle
Rinse and dry both metals, then keep the container sealed to prevent evaporation. Reassemble when needed. There is no shelf-life limit when stored properly.
This makes the salt water lamp perfect for emergency kits.
Real-World Uses and Benefits
The salt water lamp is not just a science project. It has life-changing applications in real situations.
Emergency Lighting
The lamp works during blackouts, storms, or camping when the grid is down. It is safer than candles with zero fire risk, and it is quiet and fume-free unlike generators.
Ideal for: Power outages, disaster relief, and remote cabins.
Off-Grid Living
This technology is used in the Philippines, Bangladesh, and Pacific islands to replace kerosene lamps. It cuts indoor air pollution and eliminates fire hazards. The lamp runs on seawater, making it perfect for coastal villages.
Impact: One lamp can light a small room for 8 or more hours nightly.
Classroom Science Projects
The salt water lamp teaches electrochemistry, redox reactions, and renewable energy concepts. It makes an excellent hands-on STEM activity for middle and high school students.
Curriculum Link: Aligns with NGSS standards on energy conversion.
Environmental and Safety Facts
This lamp is one of the greenest lighting options available.
Non-Toxic and Safe
The lamp contains no heavy metals like lead or cadmium. Low voltage means it is completely safe to touch. There is no fire or explosion risk.
Child-Safe: Great for homes without reliable electricity.
Eco-Friendly Disposal
Saltwater pours out safely. Zinc and copper are recyclable with low environmental impact. LEDs last 10,000+ hours, so replacement is rare.
Note: Avoid dumping large volumes of zinc-contaminated water in one spot.
Advanced Upgrades and Ideas
Take your lamp to the next level with these enhancements.
Build a Multi-Cell Battery Stack
Create a modular salt battery using a plastic block with 3-4 chambers. Fill each with saltwater and zinc-copper pairs, then wire in series for 3-6V output. This can power small fans, radios, or phone chargers with a voltage regulator.
Potential: One user powered a USB device using 12 cells and a DC-DC booster.
Combine with Solar for 24/7 Light
Use a solar panel during the day to charge a small battery or power an LED directly. Switch to the salt water lamp at night. This combination provides full-day lighting without the grid.
Synergy: Salt lamp plus Moser bottle (daylight refraction) equals free 24-hour lighting.
Design a Portable Housing
3D print or repurpose a waterproof case. Seal electrode ports with rubber gaskets. Add a handle and cover for easy transport.
Ideal for: Humanitarian aid and disaster zones.
Frequently Asked Questions About Salt Water Lamps
Can I use other liquids besides saltwater?
Yes. Vinegar, lemon juice, soda, urine, and seawater all work as electrolytes. Avoid distilled water because it lacks ions and will not conduct electricity.
Why is my salt water lamp not bright?
Salt water lamps produce low power (2-10 mW). Use a Joule Thief circuit or connect multiple cells in series for brighter light. Also check that electrodes are clean and properly connected.
How long does a salt water lamp last?
Per charge, expect 8+ hours with commercial versions or 4-6 hours with DIY builds. The zinc electrode lasts weeks to months depending on size. Copper lasts nearly indefinitely.
Can I recharge a salt water lamp?
No. It functions as a primary (non-rechargeable) battery. Replace the zinc when it is consumed.
Is it really water-powered?
Not exactly. It is a metal-air battery where saltwater is the electrolyte. Energy comes from zinc oxidation, not from the water itself.
What is the best electrode combination?
Zinc and copper provide the best balance of power, cost, and longevity. Magnesium and copper offer higher voltage but corrode faster.
Key Takeaways for Making a Salt Water Lamp
Building a salt water lamp is more than a DIY project. It is a step toward energy independence. To get the best results, use zinc and copper electrodes because they are reliable and effective. Add a Joule Thief circuit if your LED will not light with a single cell. Replace saltwater weekly and clean electrodes when they show signs of corrosion. Connect multiple cells in series when you need higher voltage. Consider pairing with solar or daylight solutions for around-the-clock use.
While it will not replace your home lighting, the salt water lamp is a safe, sustainable, and life-saving tool for emergencies, education, and off-grid living. With just salt, water, and metal, you are harnessing century-old science to light up the future.