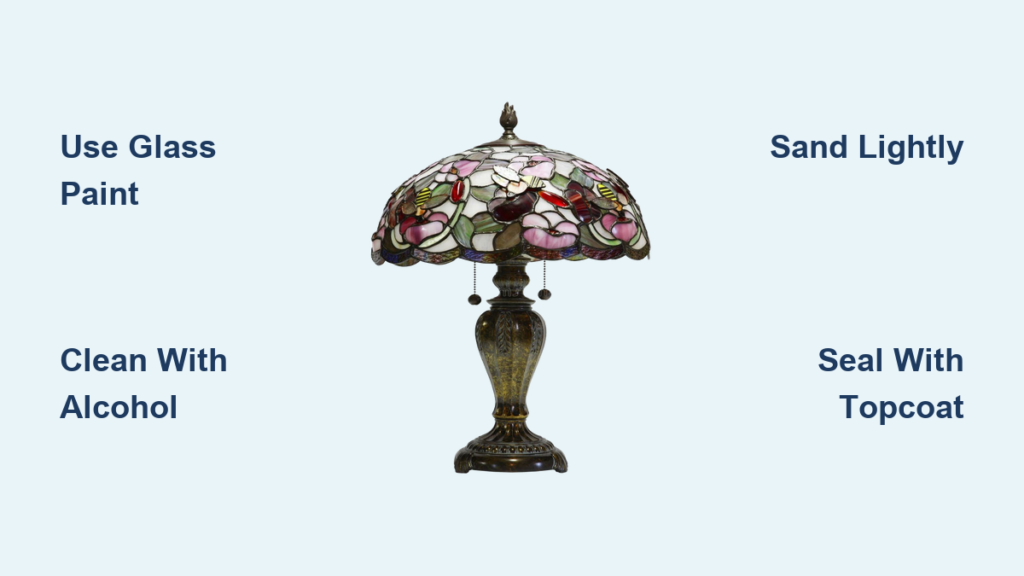
Is your glass lamp shade looking outdated or plain? You do not need to replace it. How to paint glass lamp shades is a sought-after DIY skill that lets you personalize lighting fixtures, match home decor, and breathe new life into thrifted or vintage pieces. With the right paint, prep, and technique, you can create a custom look that rivals store-bought designer lighting, all for under $25.
Painting glass may seem tricky, but modern glass-specific paints and tested methods make it accessible to beginners and rewarding for advanced crafters. Whether you want a bold solid color, elegant stenciled pattern, or faux stained glass effect, this guide delivers step-by-step instructions, pro tips, and real-world insights.
Choose the Right Paint for Glass Lamp Shades
Using the correct paint is the foundation of a successful project. Not all paints bond to glass, and using the wrong type leads to peeling, chipping, and frustration.
Use Glass-Specific Paints Only
Standard acrylics lack the binders needed to adhere to non-porous glass surfaces. Glass-specific paints contain adhesion-promoting compounds that create a durable bond. The best options include glass-specific spray paint from brands like Krylon and Rust-Oleum for even coverage on large areas. Acrylic glass paint from Martha Stewart Crafts or Pebeo Vitrea 160 offers precision for stenciling and detail work. Stained glass paints like DecoArt Glass Stain or Bibo Vitrail are translucent, allowing light to glow through the shade.
Try Budget-Friendly DIY Paint Mixtures
Create custom paint with household items when budget is tight. Mix one tablespoon of clear school glue with one to two drops of food coloring, then thin with water for a translucent wash. Alternatively, combine Mod Podge with food coloring using the same ratio for a soft tint that dries clear. These DIY options work best for interior use where the surface will not be touched frequently.
Pick Heat-Safe Finishes
Lamp shades generate warmth even with LED bulbs. Avoid paints that bubble or emit fumes when heated. Use low-VOC, non-toxic paints and apply paint to the outside of the shade to distance it from bulb heat. Never use flammable or solvent-heavy paints near electrical fixtures.
Prep the Glass Surface Properly
Proper preparation determines whether paint adheres or peels. Skip this step, and even the best paint will fail.
Remove All Electrical Components
Before painting, disassemble the lamp completely. Unplug and remove the bulb, then detach the harp, finial, and socket. Pull wiring through the base to separate the shade. Take photos during disassembly to guide reassembly later and prevent wiring mistakes.
Clean with Soap, Then Alcohol
Dust, oils, and residues block paint adhesion. Wash the shade in warm, soapy water, rinse thoroughly, and dry with a lint-free cloth. Then wipe every surface with 70 to 99 percent isopropyl alcohol to remove invisible oils from fingerprints. Let dry completely before proceeding.
Lightly Sand for Better Grip
Smooth glass can repel paint. For extra adhesion, lightly sand with 220 to 400 grit sandpaper or steel wool, focusing on glossy areas. Test on a small area first, as sanding can remove frosting or etching. Clean again with alcohol after sanding to remove dust particles.
Mask Off Areas to Protect
Use painter’s tape to cover rim edges, socket attachment points, and any hardware or metal frames. Seal electrical parts in zip-lock bags and tape them shut to prevent paint mist infiltration during spraying.
Spray Paint for Even Coverage
Spray painting delivers smooth, even coverage on large surfaces and works well for solid color transformations.
Work in a Cool, Ventilated Area
Ideal spray painting conditions include temperatures below 70°F, no direct sunlight, and no wind. Work outdoors or in a garage with cross-ventilation. Never leave spray cans in hot cars or direct sun, as pressure buildup can cause leaks.
Set Up a Controlled Spray Space
Set up a cardboard box with one side cut out as a spray tent to contain overspray and protect surroundings. Place a drop cloth underneath and secure the shade with a magnetic clip or paint gripper to avoid touching wet surfaces.
Apply Thin, Even Coats
Shake the can for 60 seconds until the mixing ball rattles. Hold the can six to eight inches from the surface and use smooth, sweeping motions from top to bottom. Apply two light coats, waiting 10 to 20 minutes between coats to prevent drips. Rotate the shade a quarter turn after each pass for full coverage.
Let Paint Cure Fully Before Handling
Allow 24 to 48 hours for paint to dry in a dust-free area. Do not reassemble or handle until completely non-tacky. Rushing curing leads to scratches, smudges, and poor durability.
Hand-Paint for Detail and Control
Hand-painting offers precision for stenciling, freehand designs, and detailed work that spray cans cannot achieve.
Use Synthetic Brushes Only
Natural bristle brushes shed and absorb too much paint. Use synthetic taklon brushes with flat or broad tips for smooth, streak-free application. Load the brush lightly to prevent drips.
Apply Paint in One Direction
Support the shade from the inside while painting. Apply paint in vertical or horizontal strokes, maintaining consistency throughout. Thin DIY glue mixtures with water for easier flow and fewer brush marks.
Let Each Coat Dry Completely
Commercial glass paint dries in two to four hours. DIY glue mixtures require four to five hours. Rotate the shade every hour during drying to prevent it from sticking to the work surface. Apply a second coat for richer color or to cover brushstrokes.
Seal with Clear Topcoat
After final drying, apply a clear acrylic sealer for protection. This enhances gloss, prevents chipping, and improves longevity, especially for high-touch areas.
Create Stenciled Designs
Stenciling adds professional-looking patterns without requiring artistic skill.
Choose the Right Stencil
Use self-adhesive stencils for easy placement, or secure regular stencils with painter’s tape. Popular designs include filigree and flourishes, butterflies and florals, and geometric patterns. For a soft glow, paint on the interior of the shade.
Use a Pouncer, Not a Brush
Swiping with a brush causes paint to bleed under the stencil. Instead, use a foam pouncer or stippling brush. Dab paint gently over stencil openings, starting from the edges and working inward.
Prevent Bleeding and Smudging
Use minimal paint on the pouncer and blot excess on paper towel. Lift the stencil straight up without sliding. If bleeding occurs, touch up with a thin pointed brush after drying.
Layer Designs for Depth
Let the first layer dry completely before adding a second stencil. This creates complex, professional-looking patterns.
Make Faux Stained Glass Effects
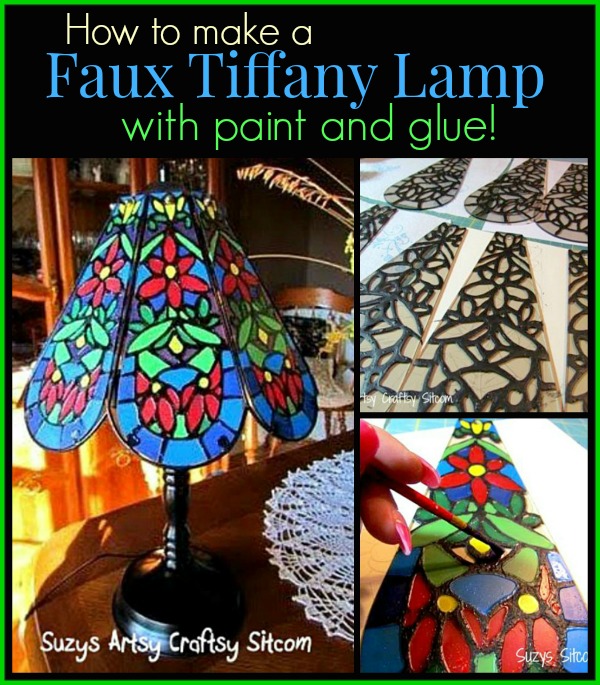
Faux stained glass creates authentic-looking results on paneled shades.
Pick a Paneled Shade
Best results come from multi-panel glass shades with metal frames, like vintage Tiffany-style lamps. Remove panels carefully for individual painting.
Outline with Black Leading
Use black glass paint leading or dimensional paint to draw outlines. Start from one side and work across, connecting lines fully to contain color. Right-handed painters should start left, and left-handed painters should start right. Let leading dry six to eight hours, or up to three days for full cure.
Fill Panels with Color
Use bottled glass paint with a fine nozzle to squeeze color into each section. Spread gently with the tip and use translucent paint for real stained glass glow. Pop air bubbles with a pin. Let dry 24 or more hours before reassembly.
Seal and Reassemble
Apply clear acrylic spray to protect glue-based paints. Reinsert panels with painted side facing out, and ensure full cure before reconnecting wiring.
Paint Pressed and Frosted Glass
Pressed glass has natural raised and recessed areas that create depth when painted strategically.
Use Natural Patterns as Guides
Pressed glass acts like a coloring book. Paint recessed sections a different color to enhance depth. Try dark gray chalk paint in recesses to mimic lead lines, or transparent glass stain for light glow.
Preserve Frosting and Etching
Frosted and etched glass holds paint well, but avoid heavy sanding as it can remove the texture. Clean thoroughly and use glass-specific paint for best adhesion.
Apply Gallery Glass Clear First
This medium adds slight texture and improves paint grip. Brush a thin layer before painting for a hand-blown glass effect.
Seal and Protect the Finish
Sealing ensures your hard work lasts for years.
Always Use a Topcoat
Unsealed paint chips and fades. Protect your work with clear acrylic spray like Krylon, Mod Podge Outdoor for extra durability, or glass-compatible sealer. Apply one to two thin coats, drying between applications.
Avoid Moisture and Abrasives
Never submerge a painted shade. Clean only with a damp microfiber cloth and mild soap, then dry immediately. Avoid ammonia-based cleaners as they degrade paint over time.
Reassemble Safely
Proper reassembly ensures safety and functionality.
Check for Full Cure
Before reattaching, ensure paint is fully cured. Press a corner gently, and if it feels tacky, wait longer.
Reconnect Wiring Carefully
Follow your disassembly photos. Ensure wires are not pinched and the socket is secure.
Test with LED Bulbs Only
Use low-heat LED bulbs rated 40W equivalent or less. Incandescent bulbs generate too much heat and can damage paint. Turn on the lamp and run for four to six hours, checking for odors, bubbling, or overheating.
Maintain Long-Lasting Results
Expect 2-5 Years of Indoor Use
With proper sealing and care, painted shades last for years. Reapply clear coat every one to two years if needed.
Avoid High-Moisture Areas
Painted glass shades are not waterproof. Avoid bathrooms or outdoor use unless fully sealed with outdoor-grade products.
Store Safely When Not in Use
Keep in a dust-free box with padding. Wrap in tissue paper to prevent scratches.
Frequently Asked Questions About Painting Glass Lamp Shades
What is the best paint to use on glass lamp shades?
Glass-specific spray paint like Krylon or Rust-Oleum works best for solid coverage. Acrylic glass paints like Martha Stewart Crafts or Pebeo Vitrea 160 offer precision for detailed work. For translucent effects, use stained glass paints like DecoArt Glass Stain.
Do I need to sand glass before painting?
Light sanding with 220 to 400 grit sandpaper improves adhesion on smooth, glossy glass. However, some glass-specific paints and DIY paint mixtures adhere well without sanding. Test a small area first.
How long does painted glass lamp shade last?
With proper sealing and care, painted glass lamp shades last two to five years indoors. Avoid moisture exposure and reapply clear coat annually if needed.
Can I paint the inside of a glass lamp shade?
Yes, painting the interior works especially well with translucent mixtures like glue and food coloring. This ensures even light glow and protects paint from wear.
What type of bulb should I use after painting?
Use low-heat LED bulbs rated 40W equivalent or less. High-wattage incandescent bulbs generate heat that can damage or bubble paint.
Key Takeaways for Painting Glass Lamp Shades
Painting glass lamp shades transforms outdated fixtures into custom pieces that match your style. The success of any project hinges on three critical factors. First, always use glass-specific paints or tested DIY mixtures for proper adhesion. Second, thorough preparation including cleaning with alcohol and proper masking protects electrical components and ensures lasting results. Third, allow full curing time of 24 to 48 hours before reassembling or using the lamp.
Whether you choose spray painting for solid coverage, hand-painting for detailed designs, or faux stained glass for authentic effects, the techniques in this guide deliver professional-looking results. Remember to seal your work with a clear topcoat, use LED bulbs, and maintain properly to enjoy your custom lighting for years to come.