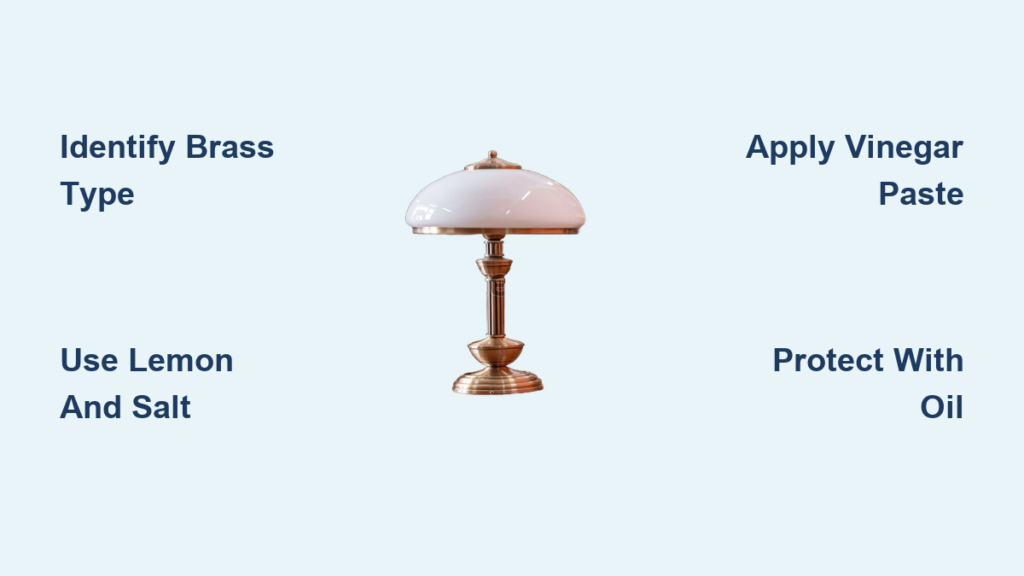
Nothing dulls the warm glow of a beautifully designed brass lamp like tarnish and grime. Over time, even the most elegant solid brass fixtures can lose their luster due to oxidation, oils from hands, and dust buildup. But with the right approach, you can restore your brass lamp to its original radiant shine, whether you are aiming for a mirror-like finish or simply preserving its vintage charm.
The key to successful brass lamp polishing lies in knowing what type of brass you are working with. Solid brass, brass-plated, and lacquered brass each require vastly different care, and using the wrong method can cause irreversible damage. This guide walks you through every step, from accurate identification to safe, effective cleaning techniques and long-term maintenance.
Identify Your Brass Type Before Cleaning
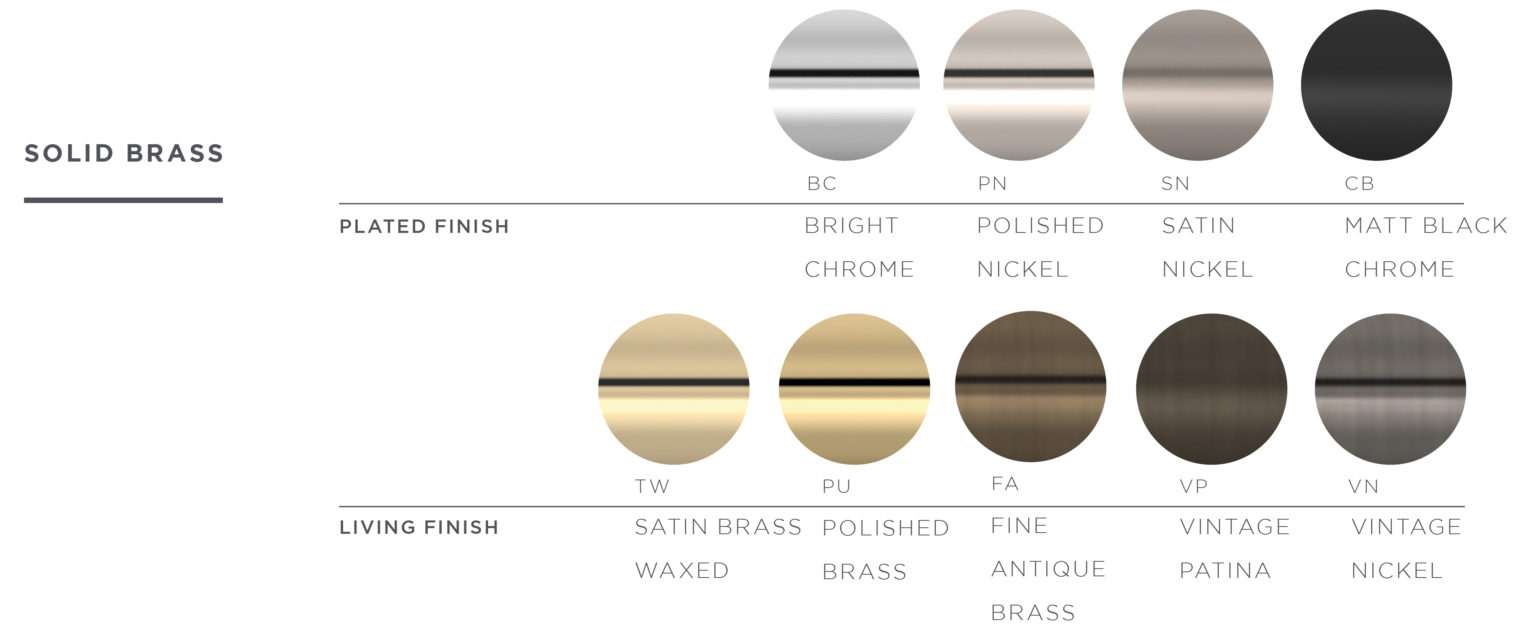
Before any cleaning begins, determine whether your lamp is solid brass, brass-plated, or lacquered. The wrong method can damage delicate surfaces permanently.
Test for Solid Brass
Solid brass is durable and responds well to aggressive cleaning. Confirm it with these tests.
Magnet Test: Hold a magnet near the lamp. If it does not stick, you have solid brass.
Weight Check: Solid brass feels heavy for its size due to dense metal composition.
Scratch Test: Lightly scratch an inconspicuous spot like the underside of the base. If the scratch reveals yellow-gold metal, it is solid brass. If it shows silver or gray, the item is plated.
Safe for vinegar pastes, Brasso, Bar Keeper’s Friend, ketchup, and lemon-salt scrub.
Detect Brass Plating
Brass-plated lamps have a thin brass layer over cheaper metal like steel or iron.
Magnet Test: A magnet sticks firmly, indicating a ferrous core beneath the plating.
Durability Warning: The plating is only microns thick and wears easily under scrubbing.
Avoid vinegar, lemon juice, Brasso, baking soda paste, and soaking. Use only warm soapy water and a soft cloth.
Spot Lacquered Brass
Lacquered brass has a clear protective coating that prevents tarnish from forming.
Visual Clue: Look for a shiny, uniform surface with no visible tarnish.
Acetone Test: Dab nail polish remover on a cotton swab and rub a hidden area gently. If the swab picks up residue or the surface feels sticky, the brass is lacquered. No transfer means it is unlacquered and safe to polish.
Never use acidic cleaners, polishes, or abrasives on lacquered brass. Clean only with a damp microfiber cloth and mild soapy water.
Gather Essential Tools and Supplies
Using the right tools ensures effective cleaning without scratching or damaging the surface.
Basic Cleaning Kit
You will need these essentials for any brass cleaning project.
Soft microfiber or terry cloths: Prevent micro-scratches during cleaning.
Mild dish soap: Gentle on all brass types.
Distilled water: Prevents mineral spots, especially in hard water areas.
Soft-bristled toothbrush: Reaches crevices, engravings, and cutouts.
Protective mat or towel: Keeps the lamp safe during cleaning.
Natural Cleaning Agents
These household items work well for solid brass with light to heavy tarnish.
White vinegar: Acetic acid dissolves oxidation effectively.
Lemon: Citric acid breaks down tarnish and adds a pleasant scent.
Table salt: Mild abrasive that boosts scrubbing power.
Flour: Thickens vinegar-salt mixture into a controllable paste.
Ketchup or tomato sauce: Ready-made acid blend that works as an effective polish alternative.
Commercial Polishes and Products
For faster, deeper results on solid brass, consider these professional options.
Brasso: Cream polish with ammonia and silica that delivers high-gloss shine. Strong fumes require ventilation. Not for plated or lacquered brass.
Bar Keeper’s Friend: Oxalic acid-based powder that is non-abrasive and highly effective. Mix with water into a paste and rinse thoroughly after use.
WD-40: Silicone and mineral oil formula that buffs to a soft shine and repels moisture. Safe for all brass types when applied with a cloth.
Protective coatings: Mineral oil, linseed oil, or furniture wax applied post-polish slows re-tarnishing. Reapply every one to two months in humid environments.
Safety Gear to Use
Protect yourself when using chemical cleaners.
Nitrile or rubber gloves: Shield skin from acids and solvents.
Safety goggles: Prevent splashes during paste applications.
Well-ventilated workspace: Essential when using Brasso, WD-40, or paint removers.
Never use steel wool, metal brushes, gel toothpaste, or soak electrical components.
Step-by-Step Polishing Methods
Choose the right method based on your brass type and tarnish level.
Clean with Soapy Water First
Best for light dust, lacquered or plated brass, and pre-polish preparation.
Steps:
- Unplug the lamp and remove the shade.
- Dust the surface with a dry microfiber cloth.
- Mix a few drops of dish soap with warm water.
- Dampen a soft cloth and wipe the brass gently.
- Use a toothbrush for intricate details.
- Wipe with a clean, damp cloth to remove soap.
- Dry immediately with a lint-free towel.
- Buff lightly to enhance shine.
This method preserves patina, making it ideal if you prefer an aged, vintage look.
Use Lemon and Salt for Natural Shine
Best for moderate tarnish on solid brass.
Steps:
- Cut a lemon in half and sprinkle salt on the cut side.
- Rub over tarnished areas using circular motions.
- Let sit for ten to fifteen minutes.
- Rinse under running water and dry thoroughly.
Alternative: Mix lemon juice and salt, apply with a cloth for larger areas.
Apply Vinegar-Salt-Flour Paste for Heavy Tarnish
Best for severely tarnished solid brass.
Ingredients:
- Quarter cup white vinegar
- Quarter cup salt
- Quarter cup flour
Steps:
- Mix into a smooth paste.
- Apply evenly to dry brass surface.
- Wait ten minutes to one hour, depending on tarnish severity.
- Rinse thoroughly with water.
- Dry completely.
Shortcut: Use ketchup or tomato sauce instead. Apply, wait up to one hour, rinse, and dry.
Try Bar Keeper’s Friend for Deep Oxidation
Best for stubborn tarnish on solid brass. Preferred by vintage restorers.
Steps:
- Mix BKF powder with water to form a paste.
- Apply with a soft cloth or sponge.
- Let sit two to five minutes.
- Scrub with a toothbrush in circular motions.
- Wipe off residue to check progress. Repeat if needed.
- Rinse well with clean water.
- Dry immediately.
Use Brasso for High-Gloss Finish
Best for mirror-like shine on solid brass.
Steps:
- Apply a small amount to a soft cloth.
- Rub onto brass in circular motions.
- Let haze over according to product instructions.
- Buff with a clean, dry cloth until shiny.
- Use a toothbrush dipped in Brasso for detailed areas.
Warning: Strong chemical smell requires a well-ventilated area. Not for plated or lacquered brass.
Make Baking Soda-Lemon Paste for Gentle Cleaning
Best for mild to moderate tarnish.
Steps:
- Mix one tablespoon lemon juice with one tablespoon baking soda into a paste.
- Apply to tarnished areas.
- Wait two to five minutes.
- Gently scrub, then rinse and dry thoroughly.
This method is less aggressive than vinegar paste, making it good for delicate finishes.
Spot-Treat with Toothpaste
Best for small areas and touch-ups.
Steps:
- Use non-gel, white toothpaste only.
- Apply to the tarnished spot.
- Wait two to three minutes.
- Rub gently with a cloth.
- Rinse with cold water and dry completely.
Handle Special Lamp Types and Designs
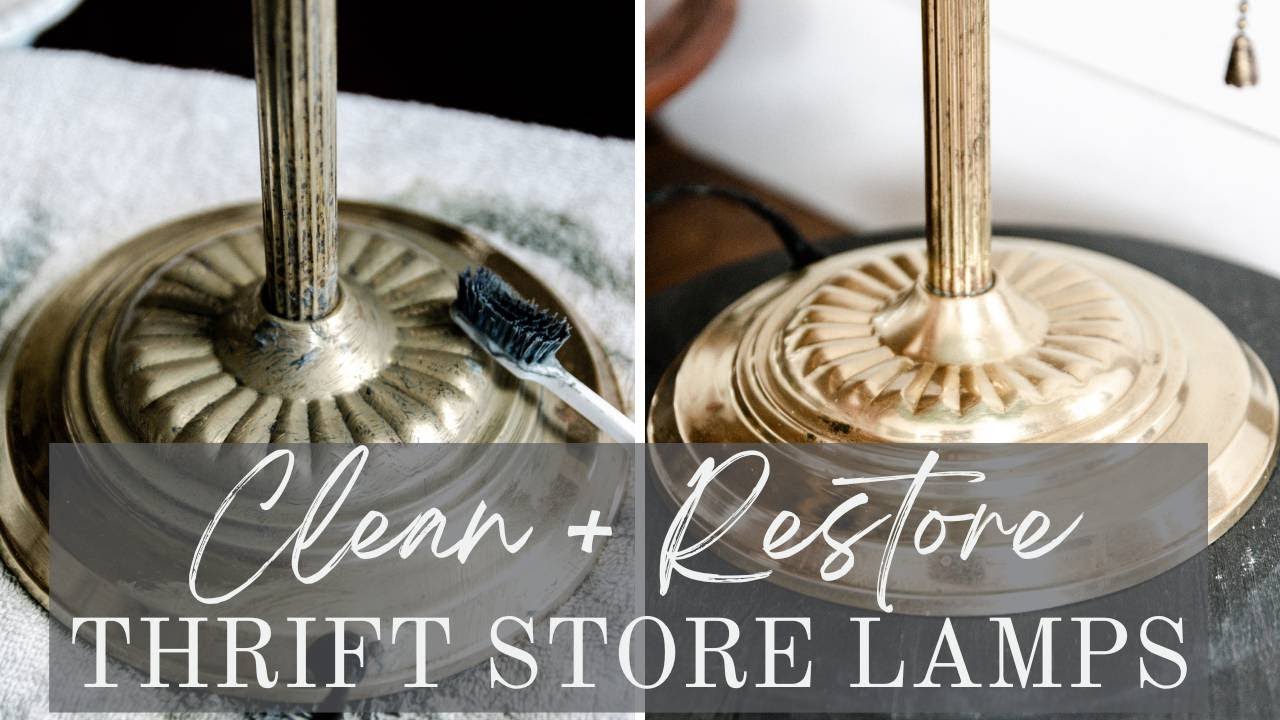
Different lamp styles need tailored care to avoid damage.
Solid Brass Lamps
Handle all polishing methods safely. These respond best to BKF, vinegar paste, and Brasso. May need multiple rounds for deep tarnish. A detailed vintage piece may require three to four hours of hand polishing but achieves a mirror shine.
Brass-Plated Lamps
Clean only with warm soapy water. Never soak or scrub aggressively. Dry immediately to prevent rust under worn plating. If plating is damaged, consider repainting with metallic brass spray paint or professional re-plating.
Lacquered Brass Lamps
Clean with damp soapy cloth only. Never use acid, polish, or abrasives. If lacquer wears off, use paint remover to strip the old coating, then re-lacquer with a clear protective finish. Professional help is recommended.
Milk-Glass or Bubble-Glass Lamps
Clean the glass separately using glass cleaner or soapy water. Treat the brass base according to its type. Never let polish contact the glass.
Vintage and Decorative Lamps
Mid-Century Modern and Hollywood Regency lamps often feature ornate metalwork. Cleaning enhances light reflection and restores warm, radiant glow.
Atomic Age lamps have geometric patterns that trap tarnish. Use BKF and a toothbrush for deep cleaning in crevices.
Asian-inspired lamps may have hand-carved engravings. Use gentle brushing to preserve detail, and consider oil coatings to enhance visibility while protecting cultural patina.
Protect Your Results After Polishing
Preserve your polished finish and reduce future cleaning frequency.
Dry Immediately After Rinsing
Any leftover moisture causes water spots and speeds up oxidation. Use a lint-free cloth to dry every surface completely.
Apply a Protective Coating
Create a barrier against air and moisture.
Options include:
- Mineral oil
- Linseed oil
- Furniture wax
- WD-40 applied sparingly with a cloth
Application method: Dab a small amount on a soft cloth, wipe evenly over the surface, and buff lightly. Reapply every one to two months, especially in humid or coastal areas.
Handle with Clean Gloves
Skin oils accelerate tarnishing. Wear cotton or nitrile gloves when handling polished brass.
Set a Maintenance Schedule
Keep your lamp looking great with regular care.
Weekly: Dust with a dry microfiber cloth.
Every three to six months: Deep clean based on environment and use.
As needed: Polish when tarnish becomes visible.
Decide Between Shine and Patina
Consider whether to remove all tarnish or preserve character.
Preserve Vintage Patina
Patina is the natural darkening from age and oxidation. It adds authentic charm to antique or thrifted lamps. To maintain patina, use only soapy water, avoid chemical polishes, and dust regularly.
Refinish or Repaint
Consider refinishing if the brass is severely corroded, uneven in color, or if plating is worn off. Metallallic spray paint gives a uniform brass look. Rub-and-buff technique highlights raised areas selectively for an antique effect.
Painted finishes are low-maintenance but less authentic than polished brass.
Troubleshoot Common Brass Lamp Problems
Quick answers to frequent cleaning challenges.
Lamp Base Will Not Shine
Built-up grime in crevices is likely the cause. Use a toothbrush with soapy water or BKF paste to reach into detailed areas.
How to Make Brass Shine Again
After cleaning, apply Brasso or WD-40. Buff in circular motions with a clean cloth for maximum shine.
Can Toothpaste Clean Brass
Yes, but only non-gel, white toothpaste. Works for small spots only, not for full restoration.
How to Tell Lamp Age
Look for manufacturer stamps on the base or socket. Fabric-covered cords indicate pre-1960s, while plastic-coated cords are post-1960s. Design style also helps date the piece: Art Deco for 1920s to 1930s, Mid-Century Modern for 1950s to 1960s.
Frequently Asked Questions About Polishing Brass Lamps
What is the best homemade brass polish?
A vinegar-salt-flour paste is highly effective for heavy tarnish. Mix equal parts vinegar, salt, and flour, apply to the brass, wait up to one hour, then rinse and dry. Ketchup works as a quick alternative for moderate tarnish.
Can I use vinegar on brass lamps?
Vinegar is safe for solid brass but damages brass-plated and lacquered finishes. Always test a hidden area first and rinse thoroughly after using any acidic solution.
How do I know if my lamp is solid brass or plated?
Perform the magnet test. A magnet sticks to plated brass because of the ferrous metal underneath. Solid brass is non-magnetic. You can also check the weight or perform a careful scratch test on an inconspicuous area.
Should I remove patina from vintage brass lamps?
That depends on your preference. Patina adds character and value to antique pieces. If you prefer the aged look, stick to gentle soapy water cleaning. For a bright, reflective finish, use polishing compounds.
How often should I polish my brass lamp?
Dust weekly with a dry cloth. Deep clean every three to six months based on your environment. Polish when tarnish becomes visible, or apply protective coating monthly to slow oxidation.
Key Takeaways for Polishing Brass Lamps Successfully
Polishing a brass lamp is a precise blend of material science, practical technique, and aesthetic judgment. The process begins with accurate identification, distinguishing solid brass from plated or lacquered finishes, and proceeds through a tiered approach to cleaning, from gentle soapy water to aggressive chemical pastes.
Success depends on matching the method to the material, respecting the object is history, and applying protective measures to prolong results. With tools ranging from household staples like lemon and vinegar to specialized products like Brasso and Bar Keeper’s Friend, anyone can restore a dull brass lamp to its original warm, radiant glory.
Whether you are preserving patina for vintage charm or achieving a mirror finish for modern elegance, consistent maintenance ensures long-term beauty. When done correctly, brass lamp polishing becomes both a practical chore and a restorative art that honors craftsmanship and elevates your space with timeless elegance.