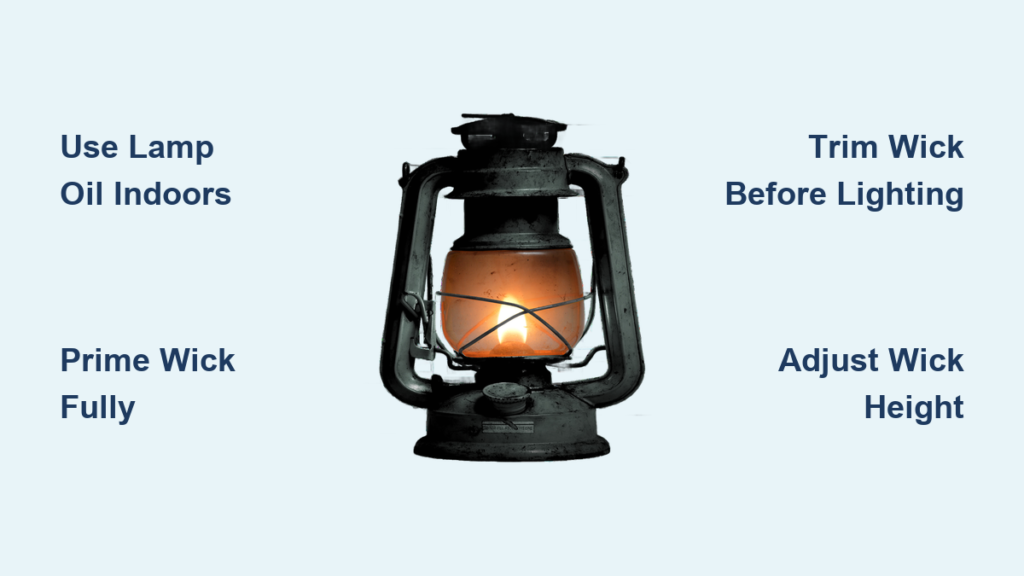
Nothing cuts through the dark like the warm glow of a kerosene lamp, especially during power outages, camping trips, or off-grid living. Learning how to light a kerosene lamp properly ensures you get clean, steady light without smoke, fumes, or fire hazards. This skill is essential for anyone who relies on these classic light sources for emergency preparedness, outdoor adventures, or decorative ambiance.
This guide walks you through every step from fuel selection and wick preparation to lighting, adjusting, and extinguishing your lamp. You will also learn maintenance tips, safety rules, and troubleshooting solutions to keep your lamp performing well for decades.
Choose the Right Fuel for Your Lamp
Selecting the correct fuel is critical for safe and efficient operation. Using the wrong fuel can cause excessive smoke, dangerous fumes, or even explosions.
Lamp Oil vs. Kerosene
For indoor use, always choose lamp oil. It burns cleanly with minimal odor and fewer harmful fumes. Kerosene (specifically 1-K grade) works for outdoor use or well-ventilated areas, but it produces a strong smell and emits carbon monoxide. Never use kerosene in enclosed indoor spaces.
Fuel Safety Rules
Never substitute gasoline, diesel, or alcohol. These fuels are highly volatile and can cause explosions. Store fuel in a labeled, sealed container away from heat and sunlight. Use a plastic funnel when pouring to prevent spills and contamination.
Prepare the Lamp Safely

Proper preparation prevents accidents and ensures smooth lighting. Take these steps before filling your lamp.
Set Up on a Stable Surface
Place the lamp on a level, non-flammable surface such as stone, metal, or ceramic. Keep at least three feet of clearance from curtains, paper, furniture, and other flammables.
Remove the Chimney Correctly
If your lamp has a handle, lift it first before twisting the glass chimney counter-clockwise to remove it. Handle the chimney carefully because it is fragile and can crack from thermal shock if dropped or exposed to sudden temperature changes. Wipe fingerprints off the glass with a dry cloth because oils from skin can create weak spots when heated.
Fill the Reservoir Properly

Filling the reservoir correctly prevents leaks and ensures proper fuel supply for burning.
Pour Fuel Without Spills
Unscrew the burner sleeve or reservoir cap and insert a plastic funnel. Slowly pour in kerosene or lamp oil until the level reaches just below the fill line. Never overfill because this increases pressure and leak risk.
Wipe Spills Immediately
Any fuel on the outside of the lamp is a fire hazard. Use a clean rag to wipe the base and threads completely dry before reassembling.
Reinstall the Burner Securely
Reattach the burner assembly by turning it clockwise until snug. Avoid cross-threading the brass cap, which can damage the seal and lead to leaks. Hand-tighten only because using tools can overtighten and crack components.
Prime the Wick Before Lighting
Proper wick preparation is the secret to a clean-burning flame. Many problems stem from skipping this critical step.
Insert and Adjust the Wick
Ensure the wick hangs down into the fuel chamber and fits snugly in the burner sleeve. It should move smoothly with the wick knob. If the wick is too tight, it will not draw fuel well. If too loose, it burns unevenly and produces smoke.
Trim the Wick
Use sharp scissors to cut the top of the wick straight across. Remove any frayed edges or charred material. A clean, flat edge ensures even burning and reduces smoking.
Let the Wick Soak Fully
Allow thirty to sixty minutes for the wick to absorb fuel completely. Thicker wicks or older oil may need up to an hour. A dry or under-saturated wick will burn poorly and create black smoke. Never light a dry wick because it damages the fiber and shortens its lifespan.
Adjust Wick Height Before Lighting
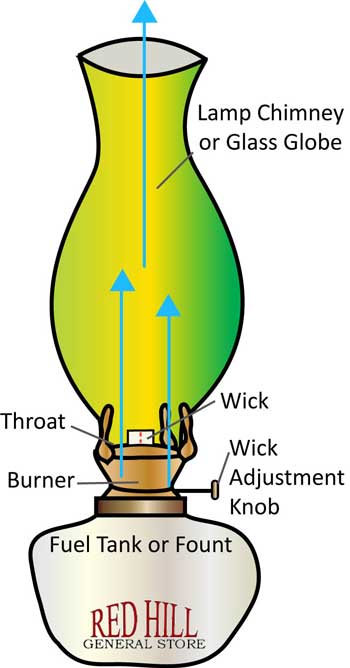
Raising the wick to the correct height before ignition prevents excessive smoke and soot.
Raise Wick Just Above Burner
Turn the wick control knob clockwise to raise the wick until the tip just peeks out from the burner opening, about one-eighth inch. Do not raise it too high before ignition because an overly high wick causes excessive smoke, soot, and flare-ups.
Check for Smooth Movement
Test the knob to ensure the wick moves up and down without sticking. If it jams, disassemble and clean the mechanism later, but do not force it.
Light the Lamp Step by Step
Now comes the moment you have been preparing for. Follow these steps for safe, successful ignition.
Ignite with Match or Lighter
Hold a long match or utility lighter to the wick. Keep your face and hands away from the flame zone. A brief puff of black smoke during startup is normal and should clear within seconds.
Use the Lighter Hole If Available
Some lamps have a small hole in the burner cap. Insert the flame through this opening while the chimney remains in place. This protects the glass and stabilizes airflow.
Replace the Chimney After Lighting
Once lit, gently twist the chimney into place clockwise. The glass improves airflow, reduces smoke, and shields the flame from drafts. Never light with the chimney off and leave it off because unprotected flames are dangerous and inefficient.
Fine-Tune the Flame for Best Performance
A properly adjusted flame provides maximum light with minimal smoke or soot.
Adjust Wick for Clean Burn
After ignition, slowly turn the wick knob downward until the flame stabilizes and smoke disappears. Aim for a steady, yellow flame about one to one and a half inches tall. If the flame is too high, soot builds up fast. If too low, light output drops.
Monitor for Flickering or Sputtering
If the flame dances or pops, check for drafts by closing windows or repositioning the lamp. Ensure the fuel level is not too low. Confirm the wick is seated properly. A flicker-free flame means your lamp is well-tuned and in a stable environment.
Extinguish the Flame Safely
Proper extinguishing prevents accidents and extends the life of your wick and lamp components.
Lower the Wick to Extinguish
Turn the wick control knob counter-clockwise to lower the wick into the burner. The flame will shrink and go out naturally. This is the safest method.
Blow Out Only If Needed
If the flame persists after lowering, cup your hands above the chimney and blow a short, firm puff downward into the globe to snuff the flame. Keep your face back to avoid burns or inhaling fumes. Never remove the chimney to blow out the flame because hot glass can shatter and fuel vapors may ignite.
Clean and Maintain Your Lamp
Regular maintenance ensures your lamp lasts for decades and performs optimally.
Wipe Chimney After Each Use
Once cool, remove the chimney and wipe the inside with a soft cloth. Soot buildup reduces light output and can flake into the flame.
Trim Wick Before Every Lighting
Cut off any blackened or frayed ends with sharp scissors. A fresh wick tip prevents smoking and ensures smooth ignition.
Deep Clean the Burner Monthly
Remove the burner assembly and soak it in a mix of equal parts water and baking soda. Boil for five to ten minutes or let sit for several hours. Scrub gently with a toothbrush or kitchen brush, then rinse and dry thoroughly before reinstallation. Baking soda dissolves carbon deposits without damaging brass or metal parts.
Store the Lamp Properly
Proper storage prevents damage and ensures your lamp is ready to use when needed.
Empty Fuel for Long-Term Storage
If storing for two months or more, pour remaining oil into a sealed, labeled container. Old fuel degrades and can clog the wick.
Keep Wick Coated in Oil
Leave the wick in the reservoir with a little oil to prevent drying. Dry wicks become brittle and hard to prime.
Disassemble and Protect
Remove the chimney and burner. Store all parts in a cool, dry place away from children and pets. Wrap glass in cloth to prevent scratches.
Follow Critical Safety Rules
Kerosene lamps require respect and attention. These rules could save your home or life.
Never Leave Unattended
A burning kerosene lamp is a fire risk. Always supervise when lit, especially around children or pets.
Refuel Only When Cool
Never add fuel to a hot or lit lamp. Wait at least fifteen minutes after extinguishing.
Ventilate the Room
Even lamp oil produces some carbon monoxide. Use only in well-ventilated areas. Open a window slightly if indoors.
Keep Away from Flammables
No blankets, books, or curtains within three feet. Avoid high-traffic zones where the lamp could be knocked over.
Troubleshoot Common Problems
Knowing how to diagnose and fix issues keeps your lamp performing at its best.
Stop Excessive Smoke
Excessive smoke is caused by a wick that is too high, untrimmed, incomplete saturation, or poor ventilation. Fix this by lowering the wick, trimming the top, waiting longer before lighting, and improving airflow.
Fix Flickering Flame
Relocate the lamp away from drafts. Refill if fuel is low. Tighten wick tension if loose.
Solve Hard Starting
Let the wick soak for at least thirty minutes. Clean a clogged burner. Replace an old or damaged wick.
Frequently Asked Questions About Lighting a Kerosene Lamp
What is the best fuel for indoor kerosene lamps?
Lamp oil is the best choice for indoor use because it burns cleanly with minimal odor and fewer harmful fumes. Kerosene produces strong smells and toxic fumes, making it suitable only for outdoor use or well-ventilated areas.
How long does a kerosene lamp burn on one fill?
A full reservoir typically lasts twenty to fifty hours, depending on lamp size, wick size, and flame height. A well-maintained lamp burns approximately one-half to one ounce of fuel per hour at medium flame.
Why does my kerosene lamp smoke so much?
Smoking usually means the wick is too high, untrimmed, or not fully saturated with fuel. Lower the wick, trim the charred tip, and allow thirty to sixty minutes for the wick to absorb oil before lighting.
Can I leave a kerosene lamp burning overnight?
No, you should never leave a burning kerosene lamp unattended. It poses a serious fire risk. Always supervise lit lamps and extinguish them before sleeping or leaving the area.
How often should I replace the wick in my kerosene lamp?
Replace the wick every one to two years or when it becomes hard to raise or lower, frayed or crumbling, constantly smokes after trimming, or draws fuel poorly.
What causes a flickering flame in a kerosene lamp?
A flickering flame is usually caused by drafts, low fuel levels, or a loose wick. Relocate the lamp away from air currents, refill the reservoir, and adjust the wick tension to secure it properly.
Key Takeaways for Lighting Your Kerosene Lamp
Mastering how to light a kerosene lamp comes down to three pillars: proper fuel selection, thorough wick preparation, and careful flame adjustment. Always use lamp oil indoors and kerosene outdoors, and never rush the wick soaking process. A fully saturated wick that is properly trimmed and adjusted to the correct height will give you a clean, steady flame with minimal smoke.
Regular cleaning and safe storage practices extend the life of your lamp for decades. Keep the chimney soot-free, trim the wick before each use, and deep clean the burner monthly. Store your lamp disassembled in a cool, dry place with the wick lightly coated in oil.
Finally, never compromise on safety. Never leave a lit lamp unattended, refuel only when cool, and maintain proper ventilation. With these habits, your kerosene lamp will provide reliable, warm light for emergency situations, outdoor adventures, or simply creating ambiance in your home.